

The Midwestern Nature Photography Survival Guide
The Midwest may not have towering mountains or dramatic coastlines—but it offers something just as powerful. In this guide, I share practical tips on light, composition, and finding compelling images in quieter landscapes.
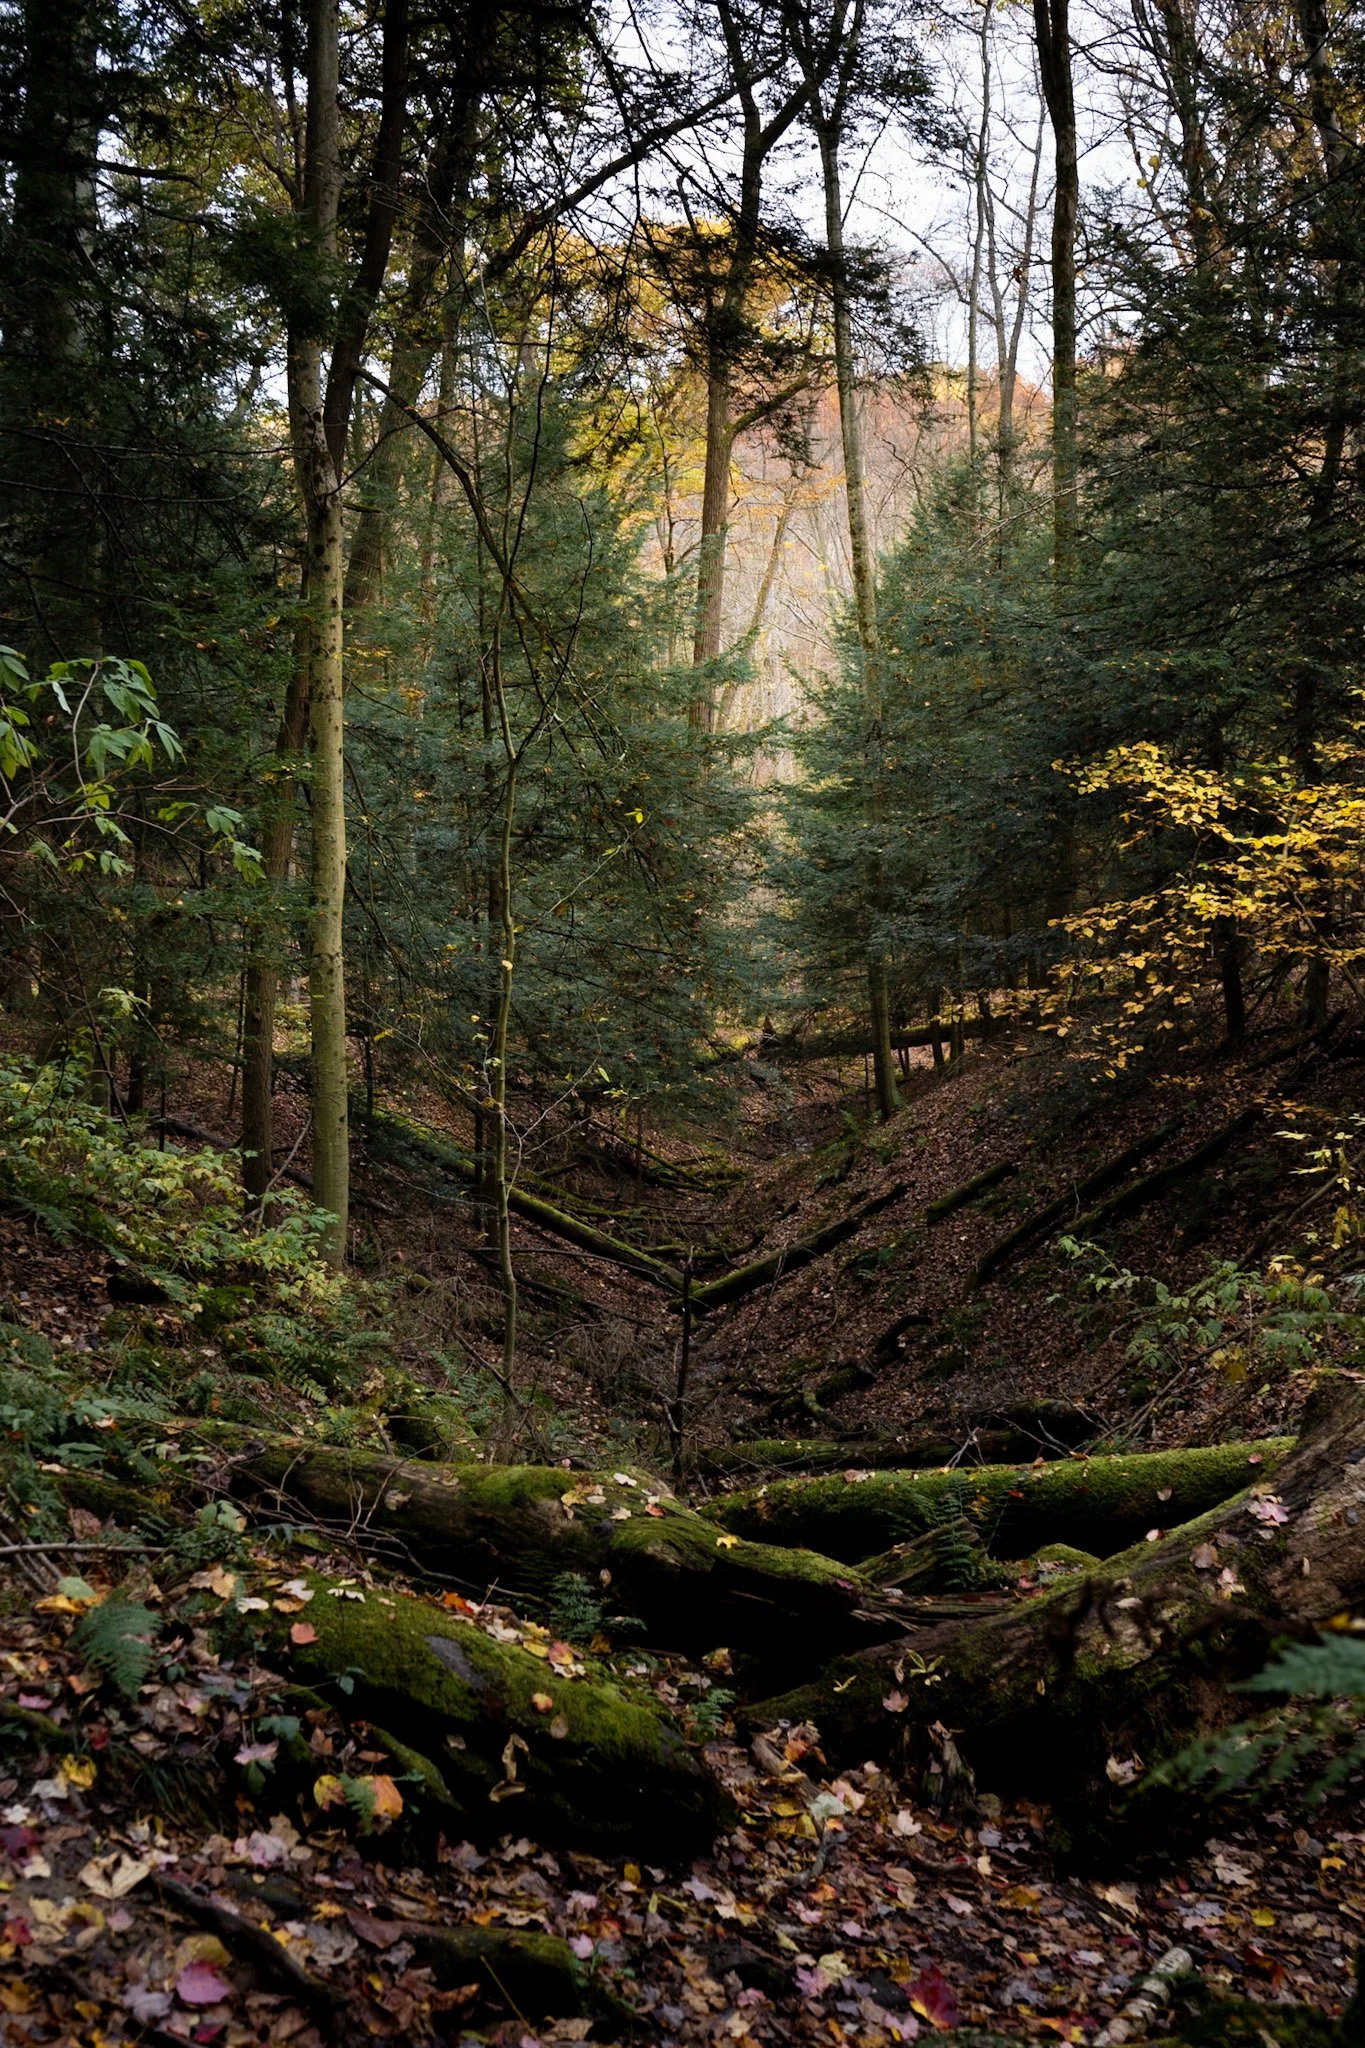
Hocking Hills State Park, Ohio
There is a certain expectation that social media seems to push when it comes to landscape and nature photography. It seems that the best images come from endless deserts, dramatic mountain ranges or coastlines that stretch far beyond the horizon.
The Midwest doesn’t typically offer that.
What the Midwest is a bit more quiet. Subtle shifts in light, weather that changes quickly and valleys and forest that don’t demand your attention - but rewards those who are willing to slow down.
Learning photography here has definitely changed the way I see. It has shown me that great images don’t always require dramatic, or exotic locations (those help), but they do require thought and the translation of emotion when to make them.
If you want to photograph the Midwest well, you don’t need to chase something bigger.
You just need to learn to see what is already there, right in front of you. Read on for my favorite tips and tricks that I learned the hard way, but helped me fall in love with photographing midwestern nature.
Boston Mills, Ohio
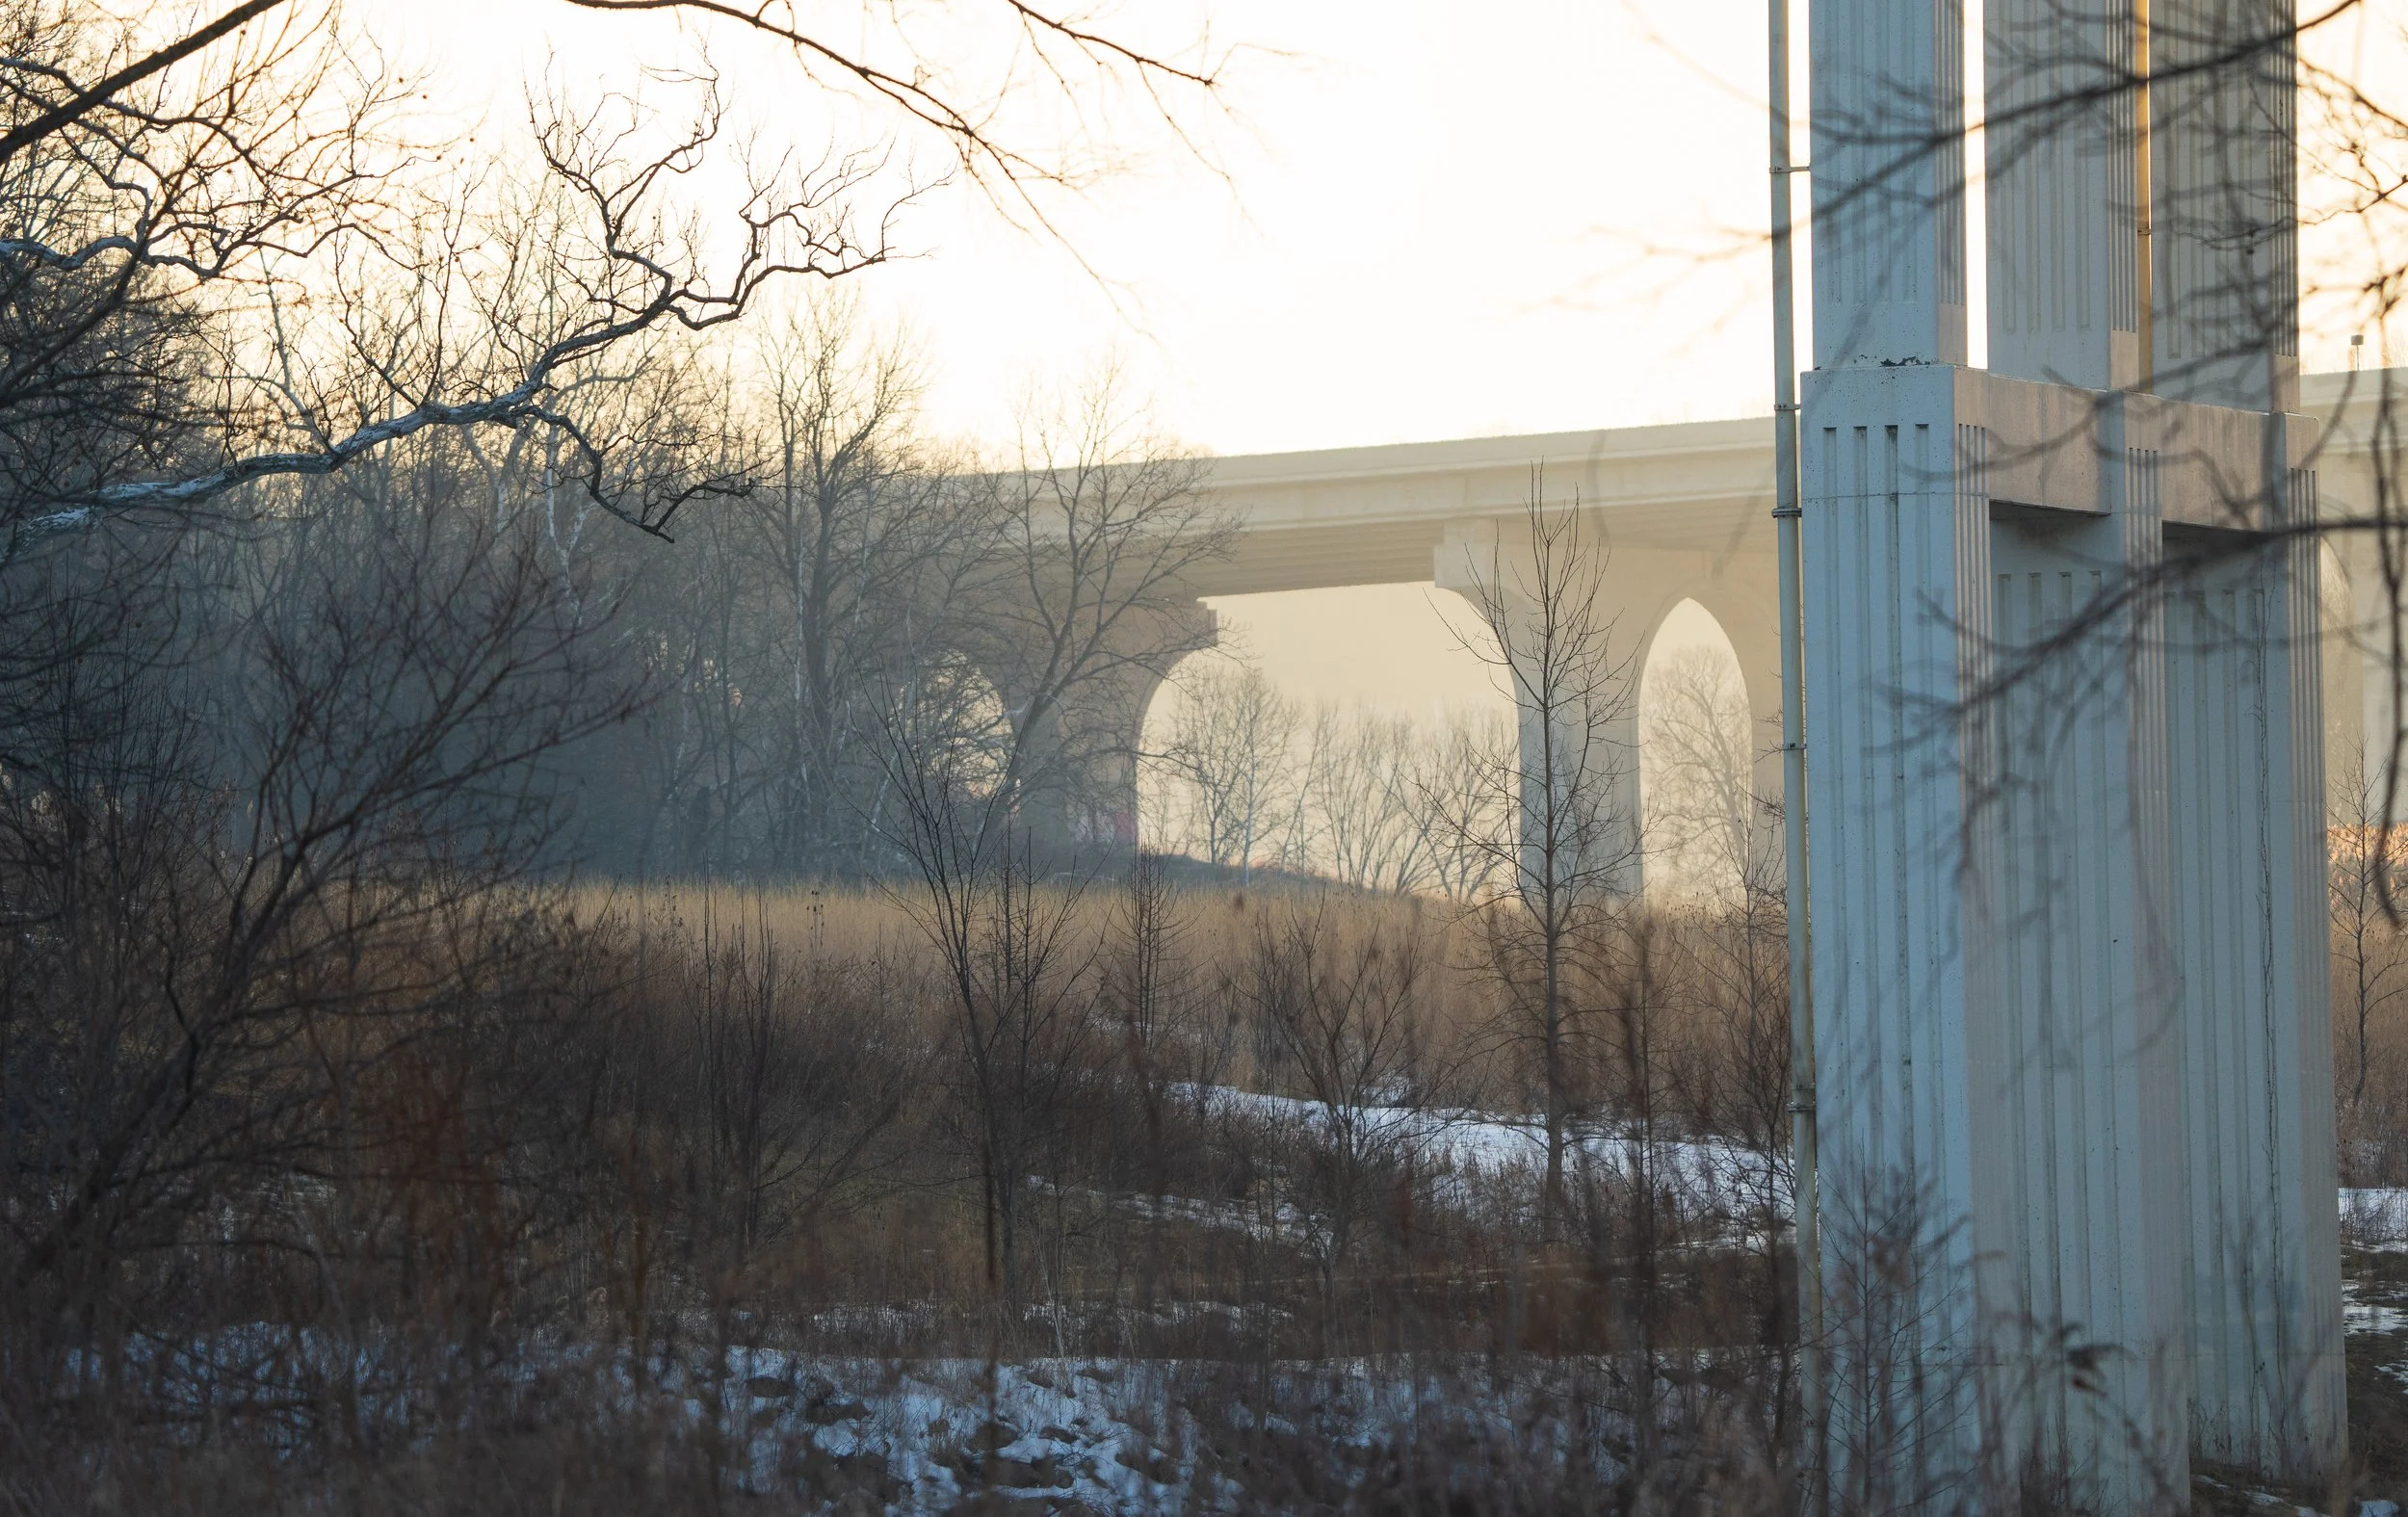
Learn to Love Imperfect Lighting
Being based in Northeast Ohio, the light changes just as quickly as the weather. Over time, I’ve learned to be ready to make images in all kinds of conditions—and while golden hour gets all the attention, don’t fall into the trap of “golden hour or bust.”
If you only head out when the light is perfect, you’ll probably come home with only a handful of images each year. Especially in places like the Valley, cloud-covered mornings are common, and that clean, golden glow everyone loves isn’t always in the cards.
But that doesn’t mean the opportunity isn’t there.
Some of my favorite images have come from less-than-ideal lighting. You just have to approach the scene differently—and having the right tools can help level the playing field.
Before I head out, I always make sure I have a solid set of lens filters in my kit. I typically carry a couple of ND filters and a CPL. ND filters allow me to reduce exposure by several stops (depending on the strength), which is especially useful for controlling motion in water or clouds. A CPL, on the other hand, helps cut glare from reflective surfaces like water and can add contrast to skies, making clouds stand out more.
Gear helps—but knowing what to shoot and when matters even more.
On dreary days, when the light feels flat, I treat it as an opportunity rather than a limitation. Instead of chasing big, open scenes, I head into the woods. Woodland photography certainly benefits from soft, filtered light through the canopy—but even without it, there’s still plenty to work with.
Look for streams, leading lines, or subtle terrain changes like ravines to bring structure and depth into your composition.
Cuyahoga Valley National Park
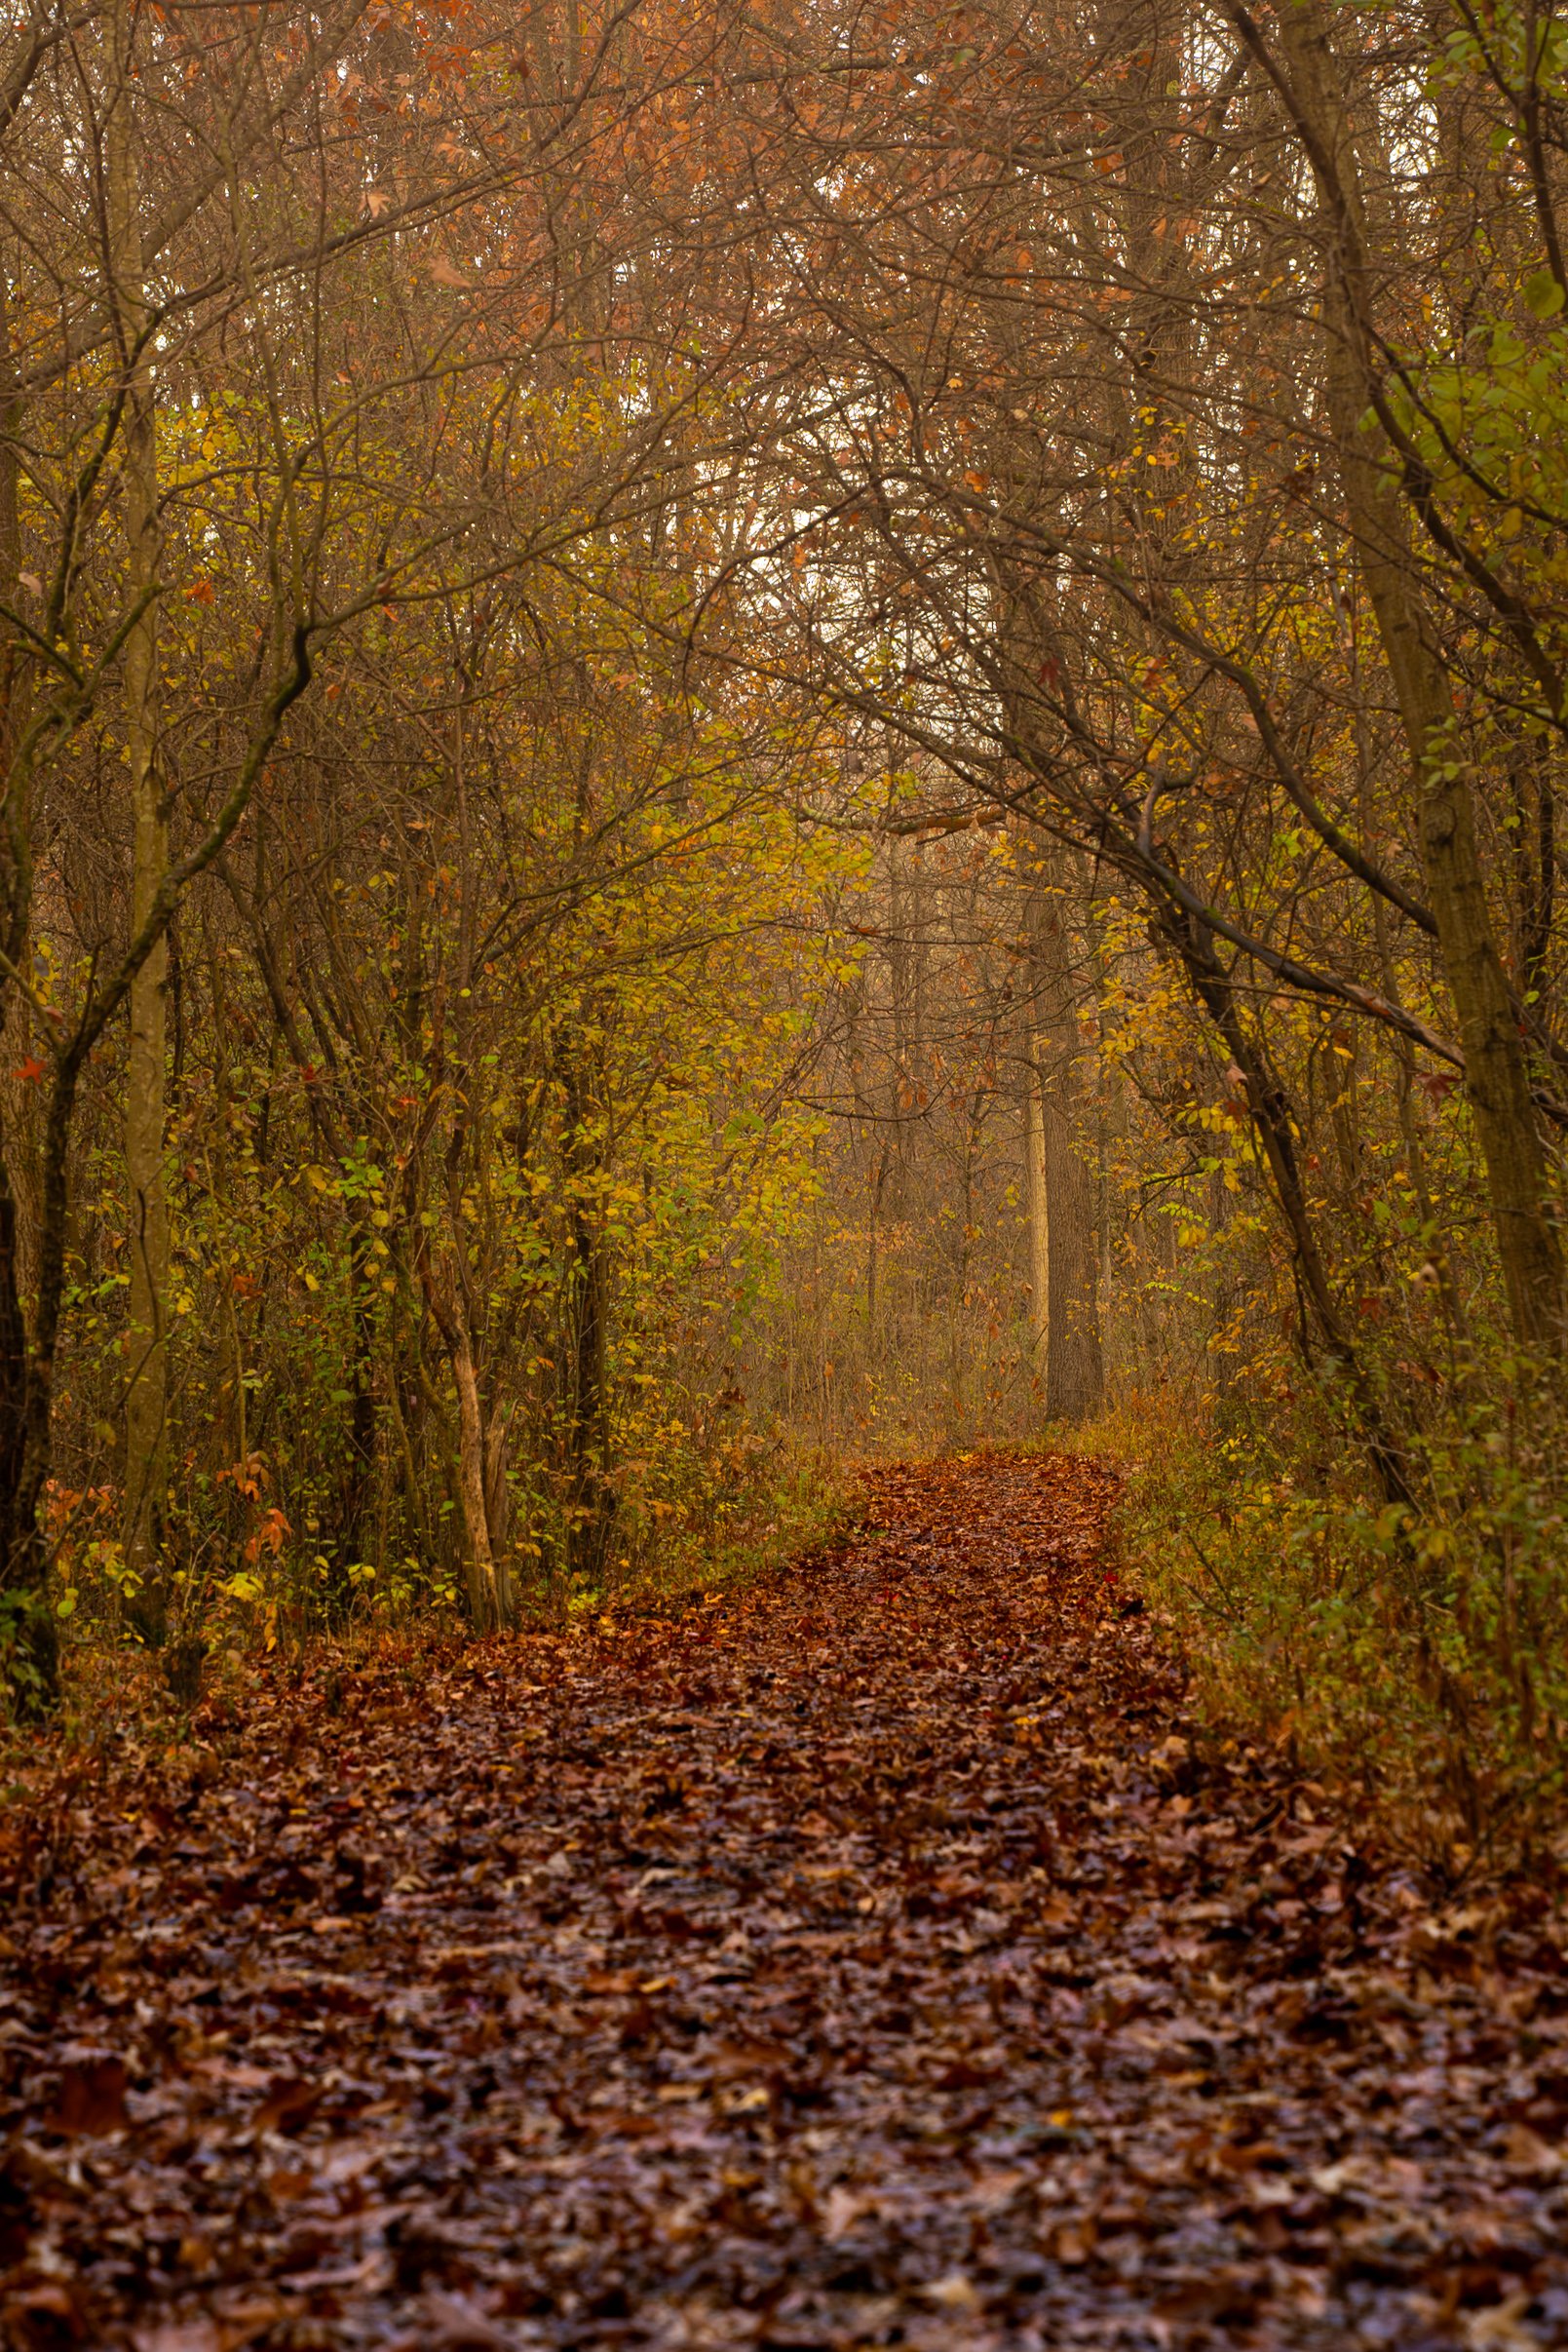
2. Fog and Haze Are Your Best Friend
In the absence of soft morning light, a foggy or hazy day feels like Christmas morning to me.
Fog has a way of completely transforming a scene. It adds depth, softens distractions, and brings a sense of mood that’s hard to replicate any other way. A trail you’ve walked a hundred times can suddenly feel cinematic—almost like something out of a fairytale.
Take the image above, for example. I had walked that trail countless times, but it wasn’t until that particular morning that it truly stood out.
The tricky part is actually finding the fog.
Unlike rain or clear skies, fog isn’t always easy to predict—but that’s part of what makes it so rewarding when you can capture it. Generally, your best chances come when nights are cool and mornings warm up quickly. As the air temperature rises, it interacts with the moisture on the ground and creates that low-lying fog photographers love.
As we move into seasons with warmer days and cooler nights, it’s worth checking the forecast before bed. If the conditions look right, setting your alarm a little earlier can make all the difference.
Another reliable place to look is near bodies of water. Lakes, ponds, and rivers tend to produce fog more consistently than open ground, especially in warmer months. These conditions are perfect for creating those quiet, moody, almost mystical scenes that define so much of Midwest photography.
Hocking Hills State Park, Ohio
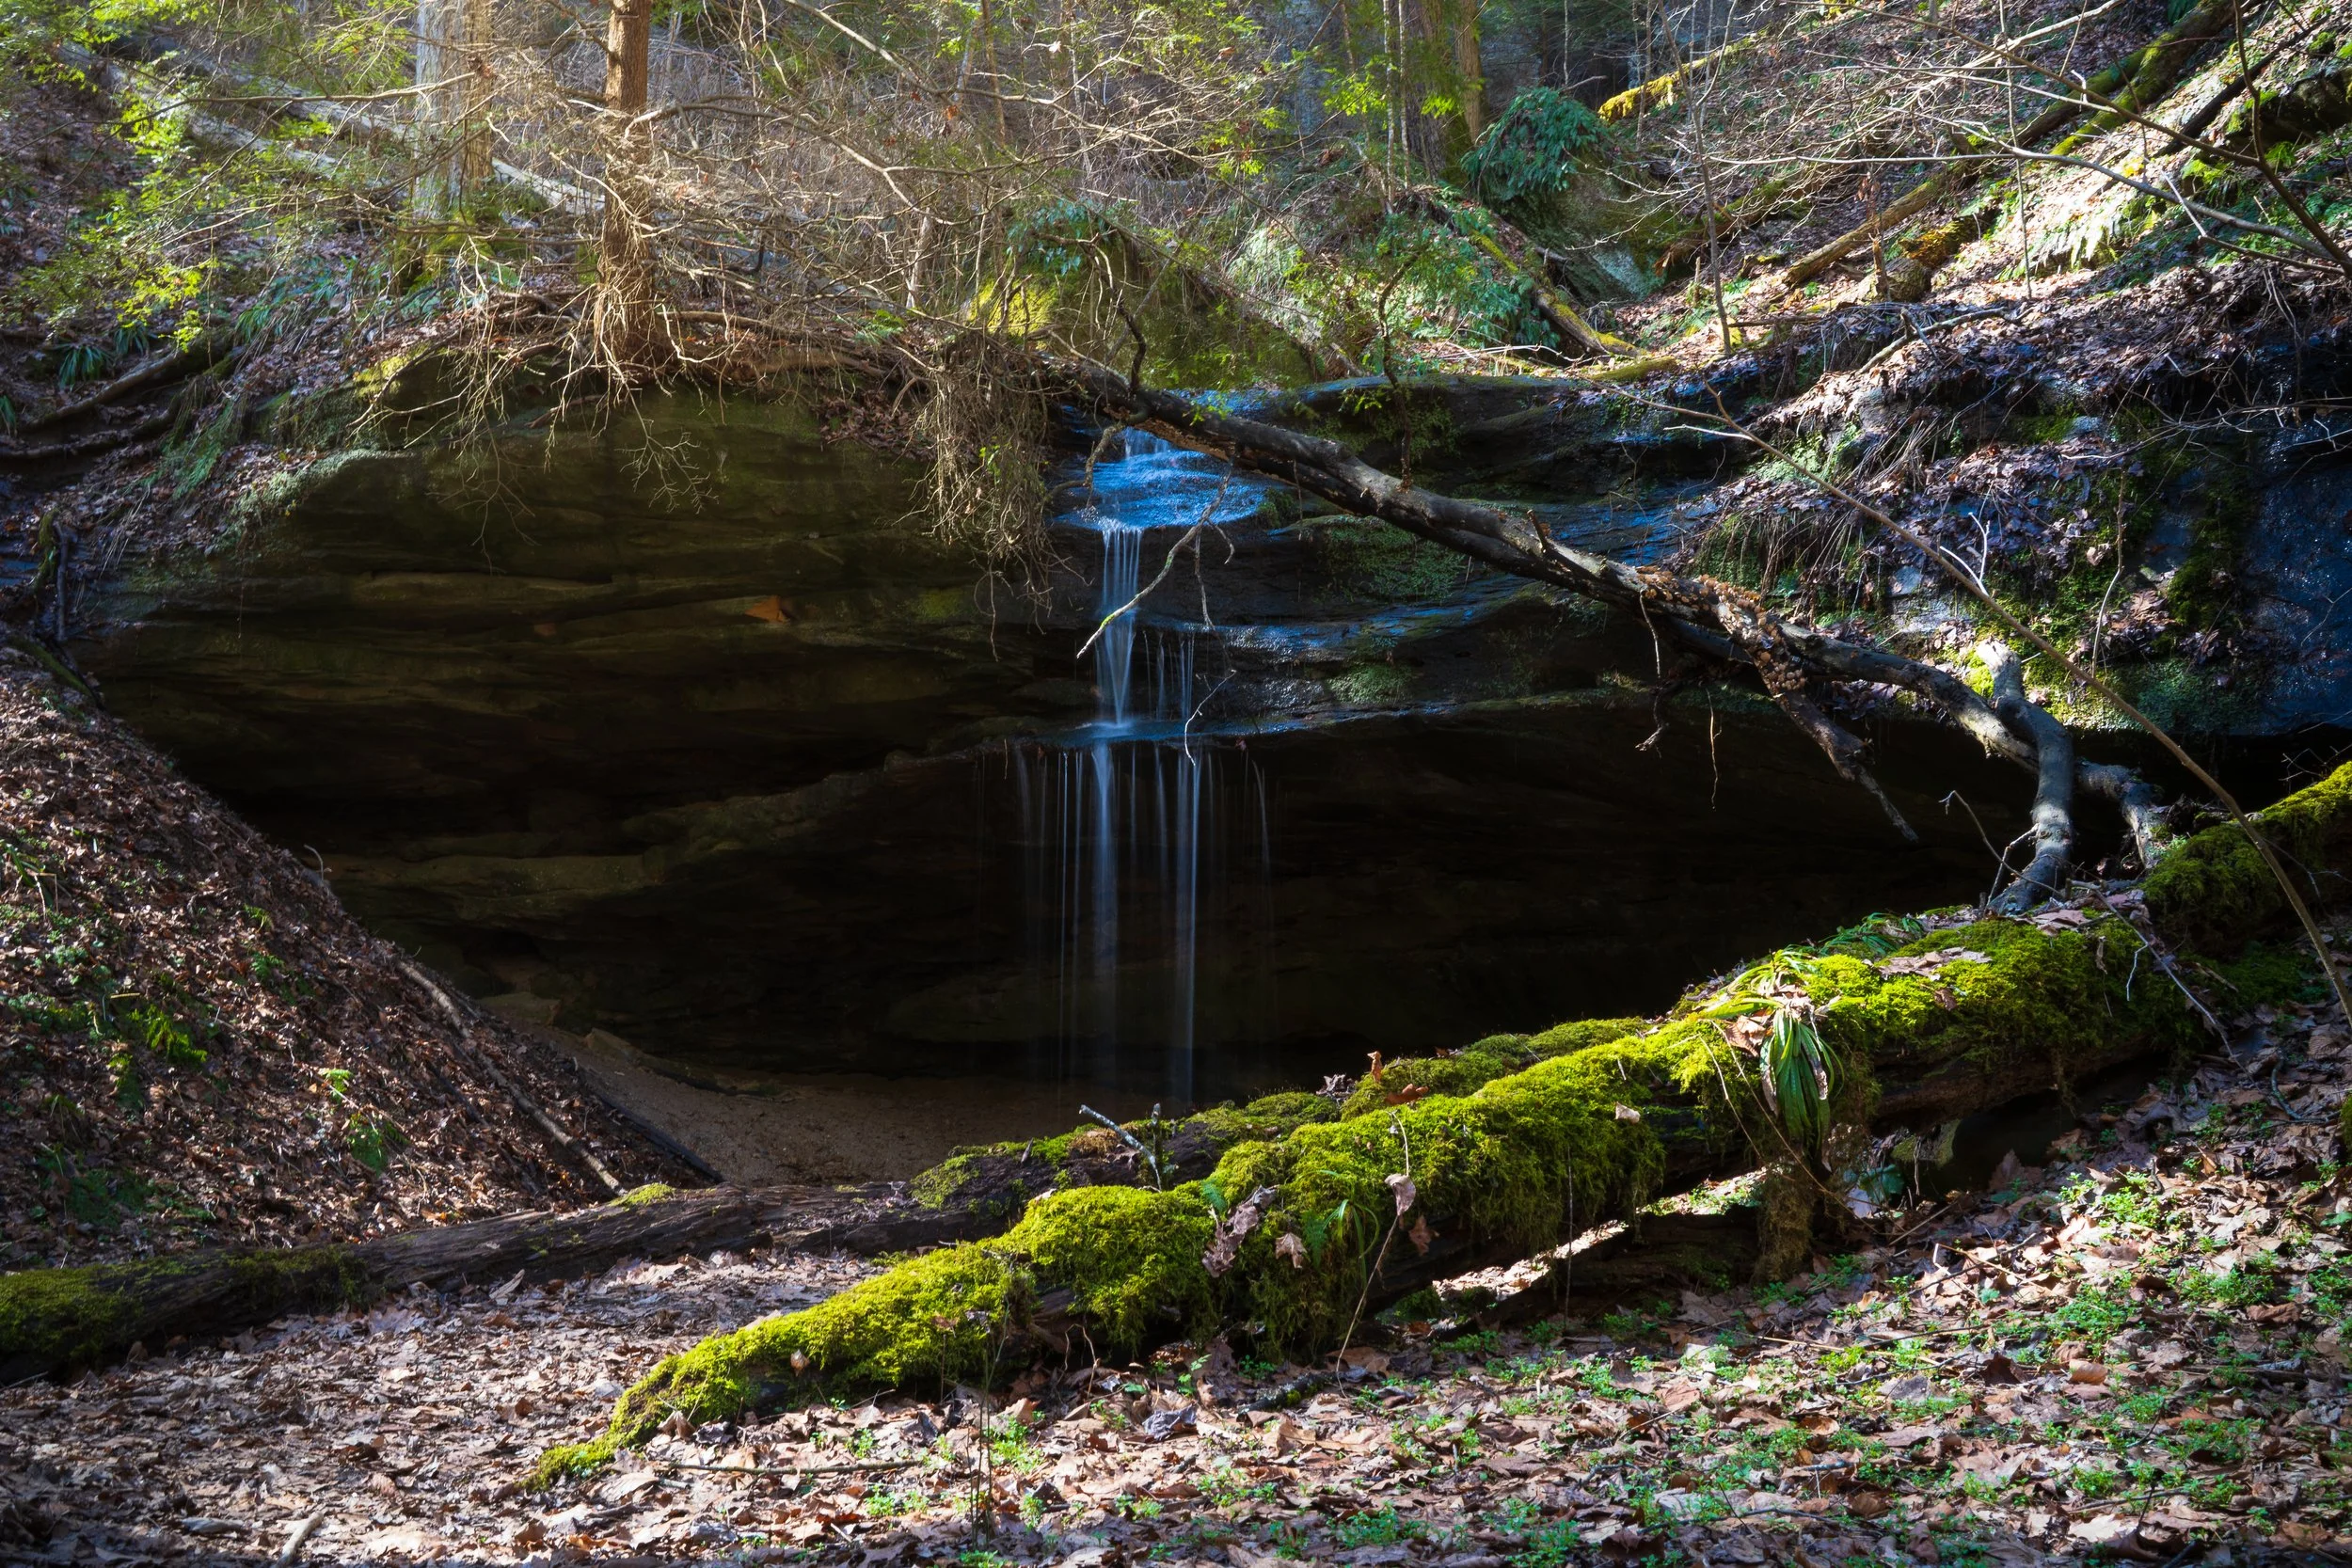
3. Finding Water
Water is one of my FAVORITE things to photograph. The best part is that there is so much water throughout the midwest, you could build your entire portfolio out of it.
Photographing water offers so much diversity; waterfalls, rivers, streams, lakes - you name it. Waterfalls are easily my favorite to photograph. The long exposures are challenging, but they really pay off when you get it right. I love the whispy tendrils of water as the cascade over the rock faces.
I mentioned the ND filters earlier in this article and for waterfall photography they are critical. If you are newer to photography, or nature photography, I’ll include a brief “how-to” on getting some beautiful waterfall images.
In order to get a good long exposure, you will need to use a slower shutter speed to extend the waters motion. Normally I have my shutter speed set anywhere between 0.8” and 1.2” (.8 seconds - 1.2 seconds). This causes the exposure to be very bright, that is why it is very important to have the ND filter, the filter will act as sunglasses for your lens. You’ll also need a tripod to make the most of long exposures. You could hand-hold your camera - I’ve had to do it, particularly on my trip through Watkin’s Glen, NY - but this will introduce some camera shake to your frame.
Another point of note for photographing waterfalls: there is no one-size-fits-all shutter speed when it comes to them. You’ll have to factor in how much water is moving and how quickly that water is moving. This sounds far more intimidating than it really is. All you have to do is take a few test images at different shutter speeds and zoom in on the water to check that it is smooth. Trial and error goes a long way - eventually you’ll be able to calculate this in your head without too much thought!
Bodies of water really open up so many opportunities. On top of the things that I already mentioned, water provides its own type of life that you can capture. Boats, sunsets, lighthouses, wildlife; the list goes on and on.
When you are photographing water, it is important to play with your angles. Taking just a picture of water can often times make the image look flat. Look for subjects to place in your frame, get your camera as close to water level as you can to get beautiful reflection images, Even when I am photographing waterfalls, my focus isn’t just on the waterfall. There are times and places for that, but I like to add other elements from the scene to give it some depth.
Bedford Reservation, Ohio
4. Finding Composition Without Mountains
One of the biggest challenges of photographing the Midwest is learning how to build striking compositions when nothing in immediately stands out.
In places with mountains, or more dramatic landscapes, the scene often does a lot of the heavy lifting for you. Here it is a little different - you have to be a bit more intentional with your images.
Ledges Trail, Cuyahoga Valley National Park
For me, my composition starts with something simple; a line, an angular shape or a point of interest.
Trails, rivers, fences, or even the way tall grass bends in the wind can all act as leading lines - guiding the viewers eye through the frame. Instead of looking for one big subject, try to find smaller elements that work together to tell the story of the landscape.
I think that this image is a great example of finding a leading line through your scene. I came upon this ravine while hiking on the Ledges Trail in the Cuyahoga Valley National Park (one of the parks more popular trails). The depreciation in the middle ground creates this attractive “V” shape, carrying your eye through the scene. This “V” becomes the foundation od the image. The fallen logs in the foreground act as anchors for that leading line.
We’ve got some really beautiful trees that occupy different layers of the image, pulling together the narrative of this area. To me, the fallen logs covered by moss represents age and time-worn; but with the trees at various stages of life signify life and growth.
The contrast is what makes this photograph feel complete. Just by using some basic photography techniques; leading lines and foreground, we’ve got a scroll-stopping image.
5. The Willingness to Return
The Midwest rewards those who are willing to return.
Scouting locations is a common practice in photography, visiting a place ahead of time to explore angles and get a feel for the scene. While that’s valuable, I’m talking about something a little different.
I mean coming back. Again and again.
Some of my best images have come from places I’ve visited multiple times. Each visit reveals something new—something I didn’t notice before. A different angle, a new composition, or a detail that only stood out because I was looking more intentionally.
It’s similar to driving the same road over and over. One day, you suddenly notice a building or a sign you swear wasn’t there before. It was always there—you just hadn’t seen it yet.
Photography works the same way. Returning to a location gives you the opportunity to see it differently.
And just as important (you’ll notice a theme here)—light changes everything.
A scene that felt flat one day can feel alive the next. The way light filters through trees, or settles into a landscape can transform an ordinary scene into something worth capturing.
I’ve lost count of how many times I’ve stood on a trail thinking, “If the light hits that just a little differently, this could be something special.”
The only way to catch that moment is to come back.
6. Introducing Subjects to Your Landscapes
When I started my photography journey, I had this preconceived notion that landscape and nature photography should only be natural landscapes. While I still like to keep some sort of demarcation between nature and humanity; I was foolish to think that there weren't opportunities where the two married well.
Introducing a man-made object or structure to your scene can really give your images life, especially on days that you don’t feel your best.

Glade Creek Grist Mill, Babcock State Park, West Virginia
The Glade Creek Grist Mill is a perfect example of structures adding to a landscape frame. The old-world building nestled upstream from those gorgeous waterfalls. Architecture, especially older architecture, can look like it has always been there - or it was meant to always be there. One of the main draws to landscape photography is that it looks and feels organic.
I find it is best to use a building that adds to the scene rather than dominates it; like your favorite sit-com-you’ve got five friends that always seem to be together, they have their own storylines, but none of them feel like the main character. You can definitely make some beautiful images where the structure is the main character, but this is my favorite way to merge the two.
7. Honorable Mentions
Wildlife
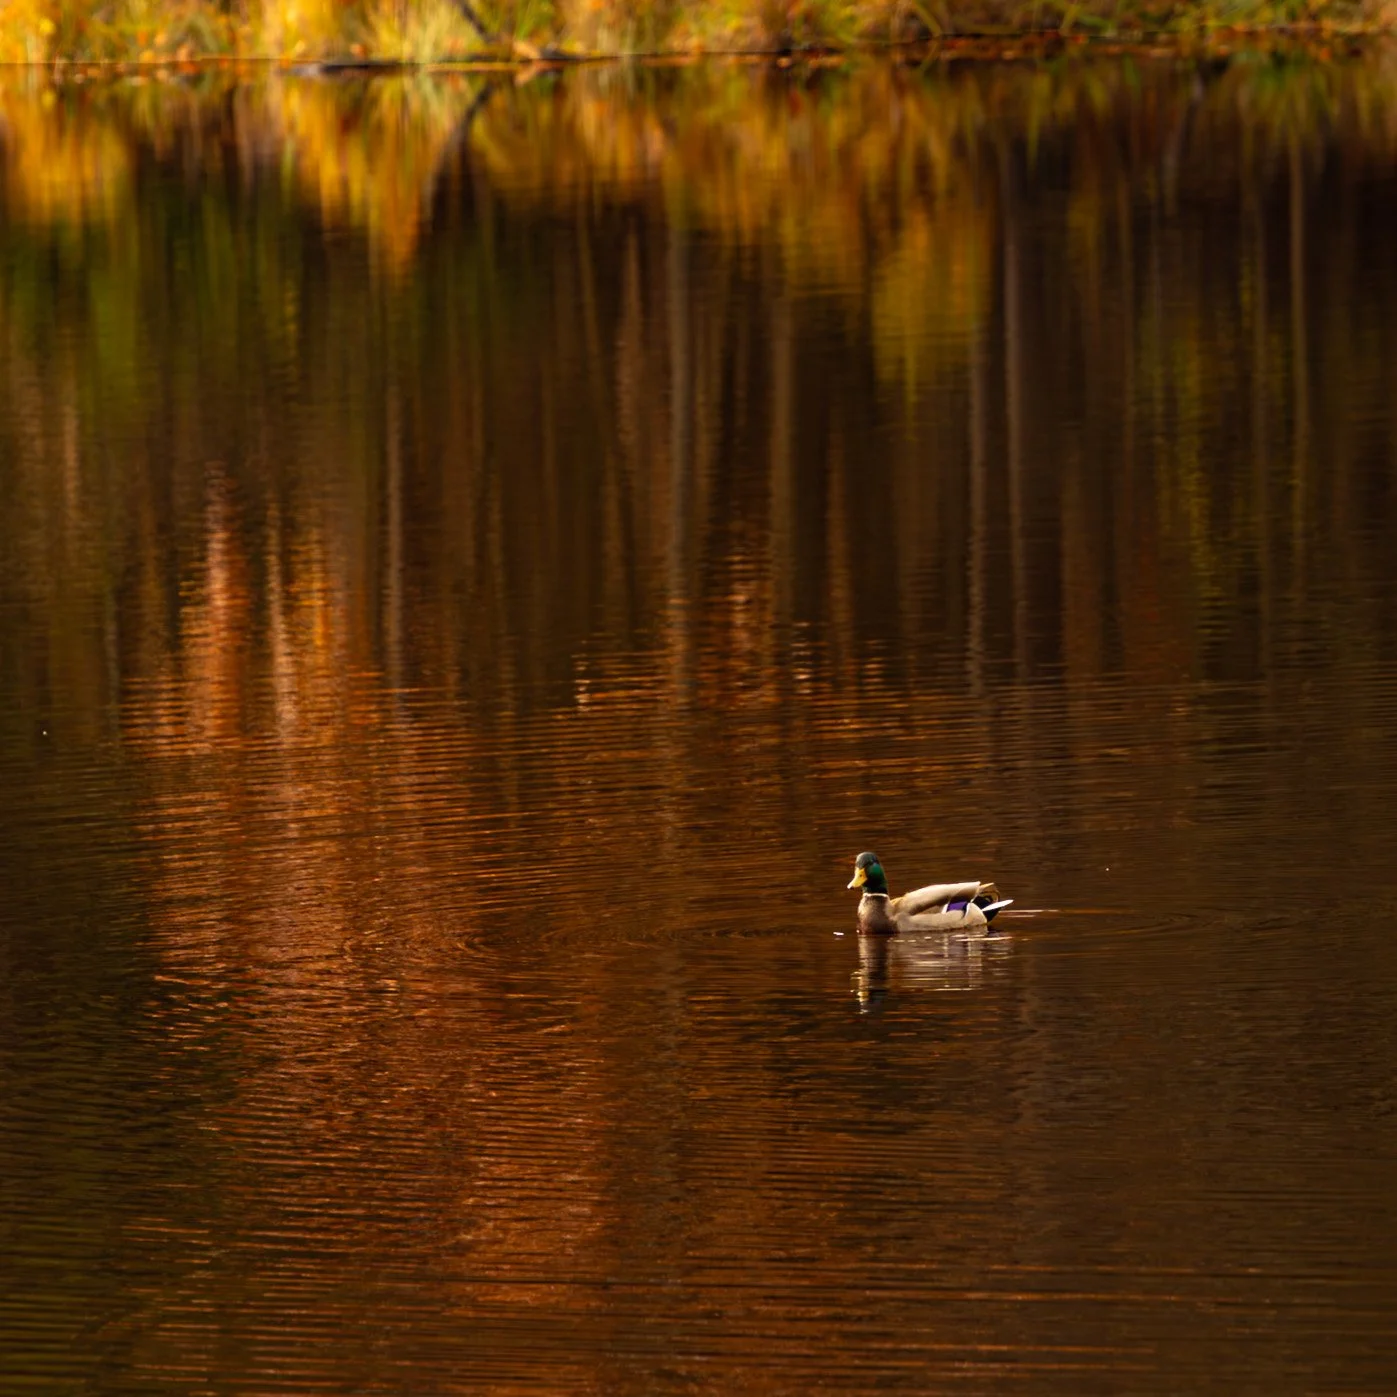
Wildlife is always a great sub-niche for landscape photographers. Normally you’re in the woods, wildlife tends to be the in woods-it’s an easy aisle to cross. There is a common misconception that you need to have a really expensive, long focal length lens to photograph wildlife. While that is nice to have to get some really detailed shots, it isn’t a requirement. I have taken a lot of great wildlife photographs with my Tamron 28-200mm lens!

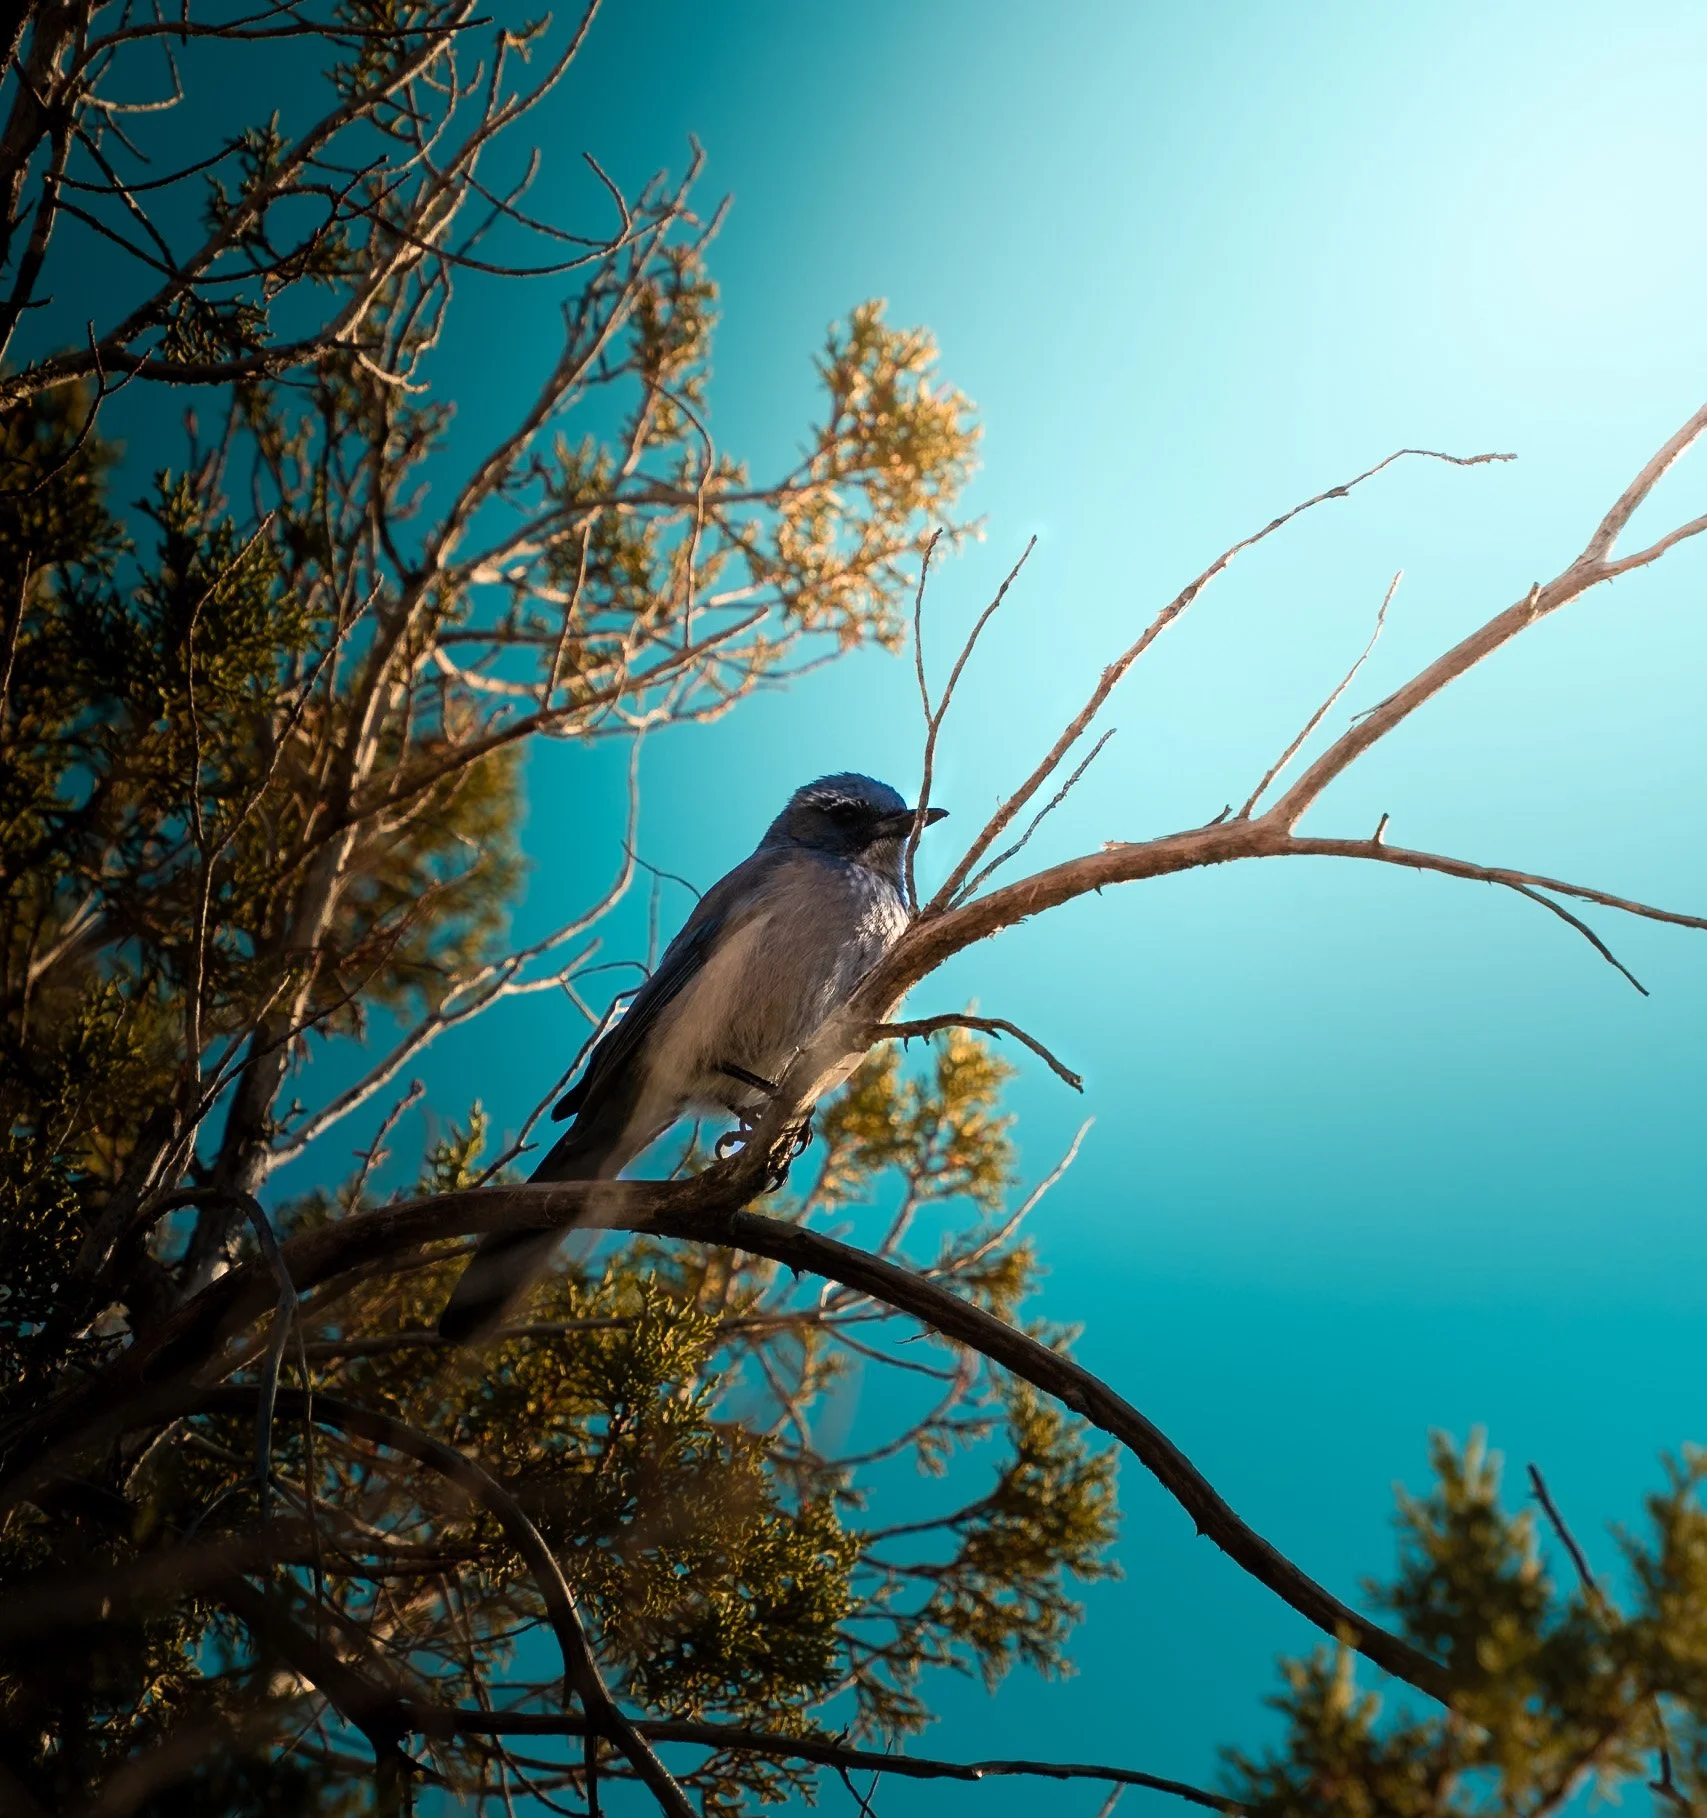

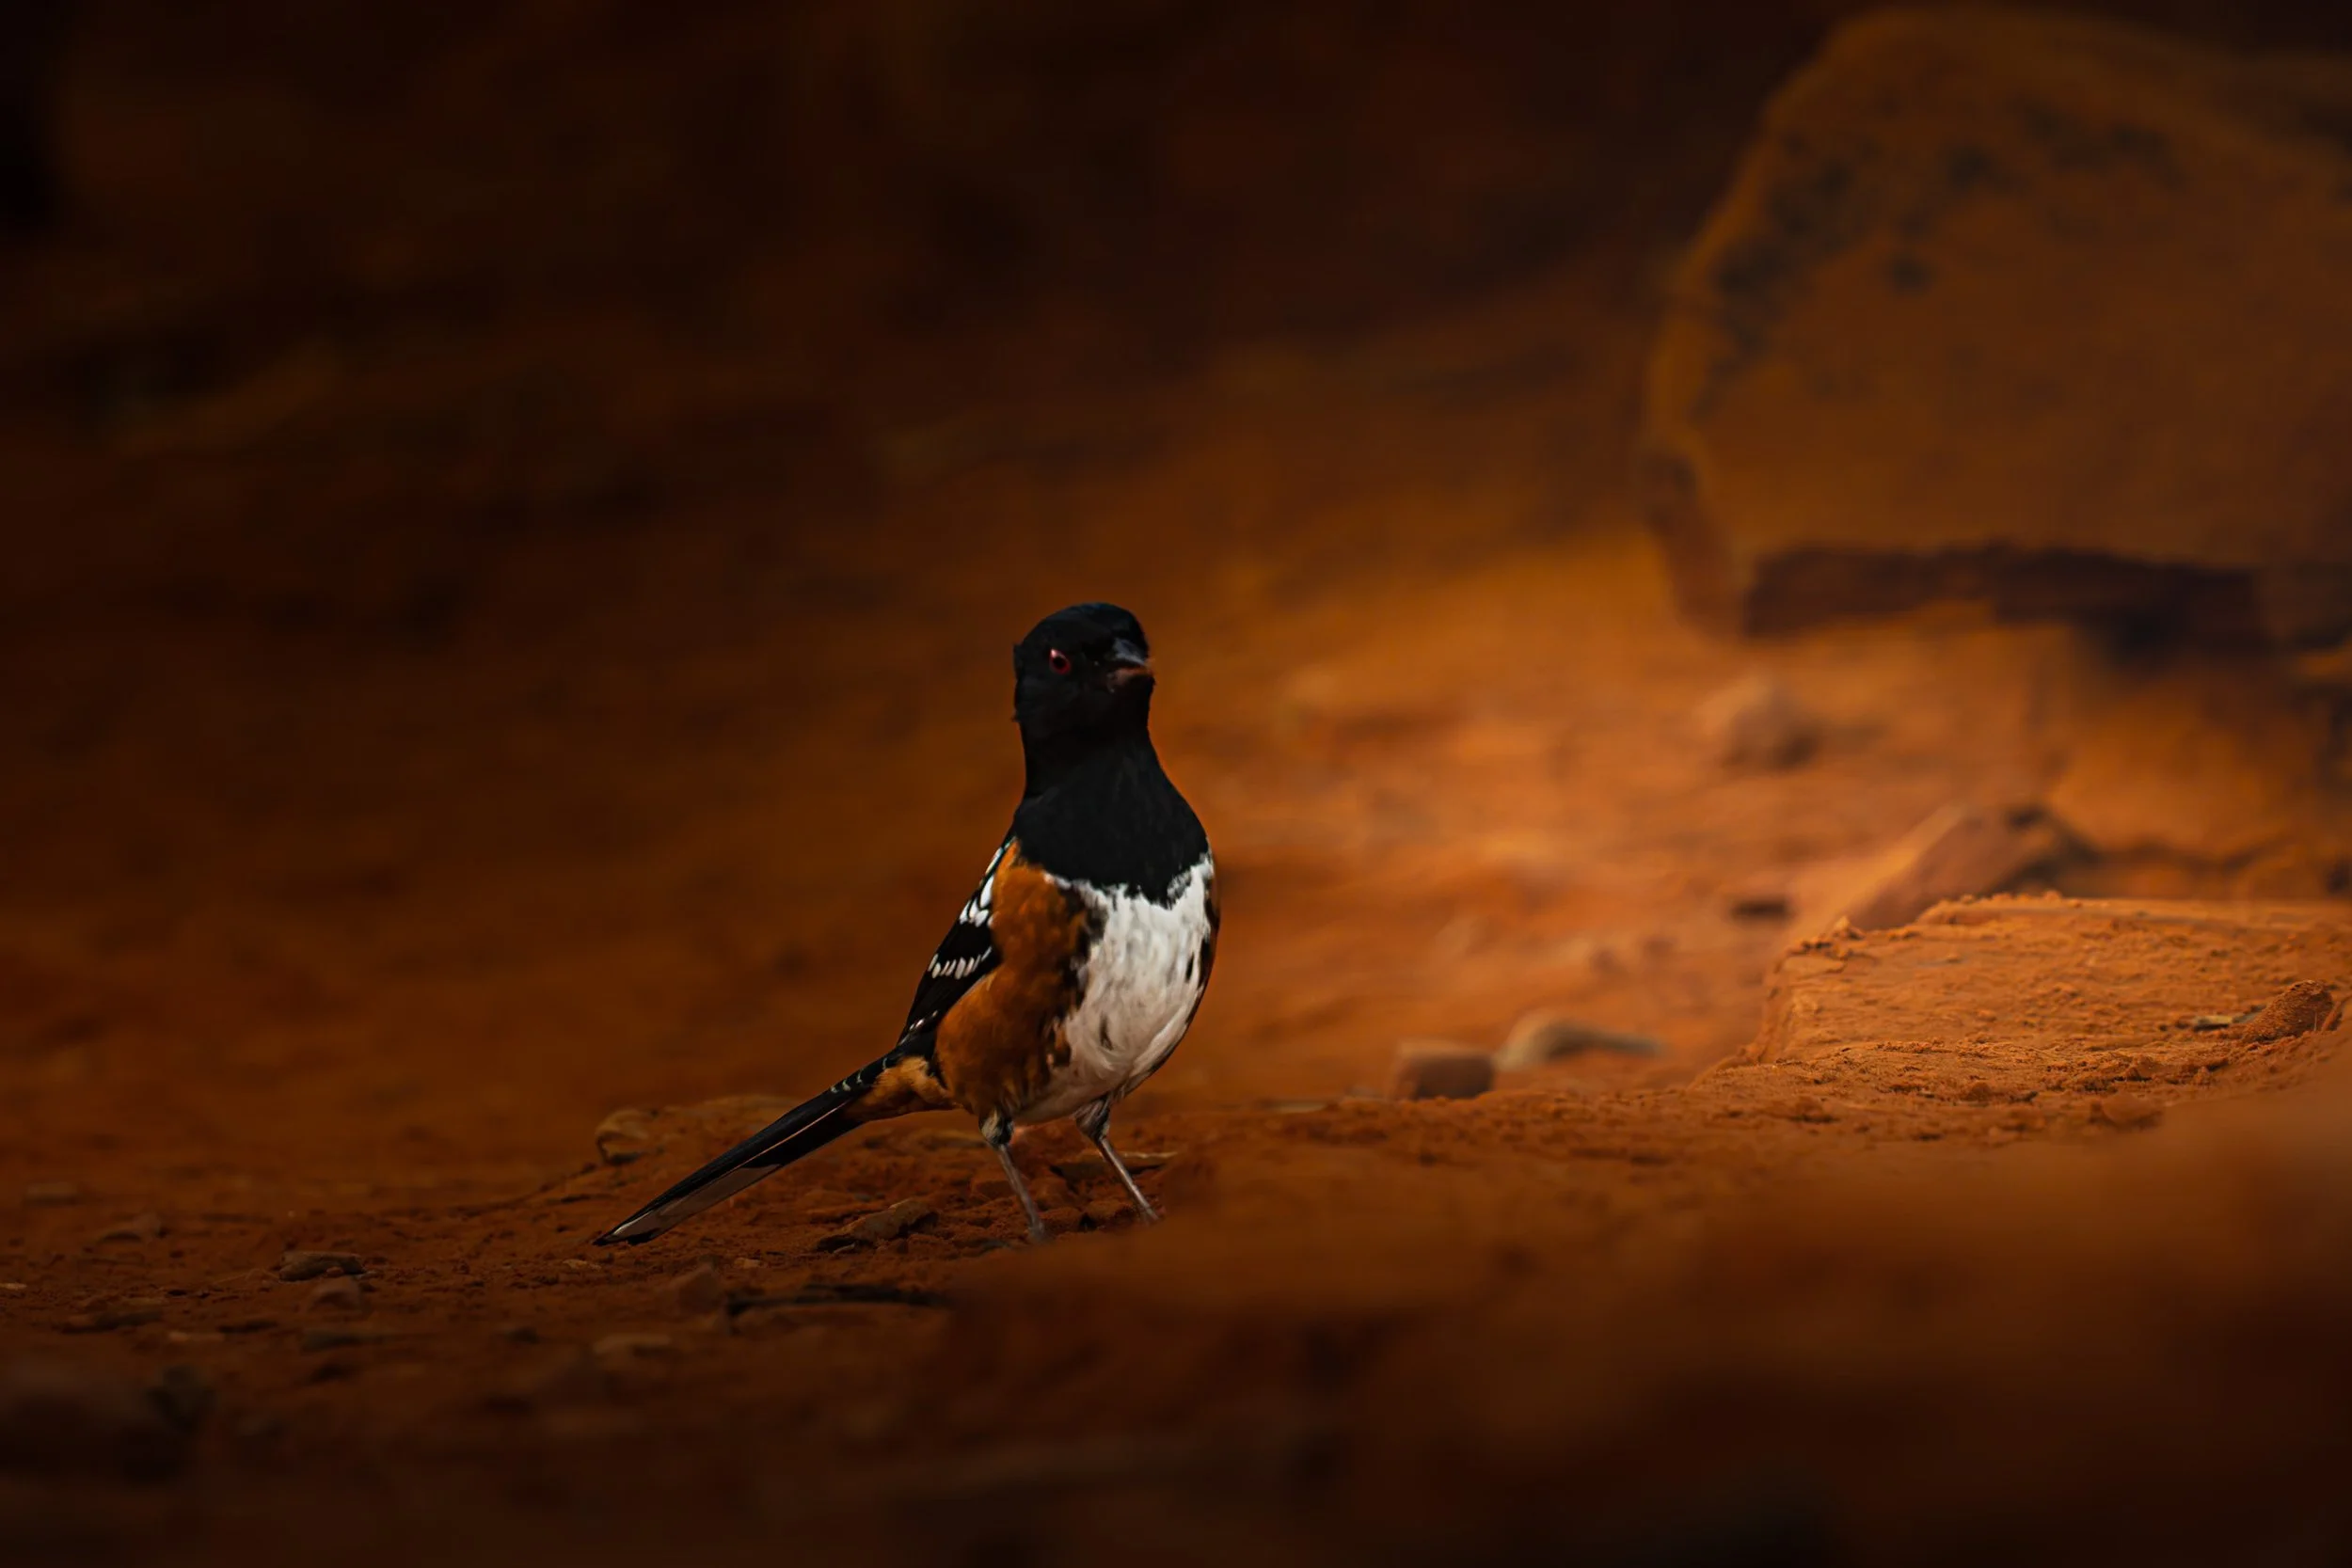
Here are just after few examples of some wildlife images I took home before I got a longer focal length lens!
It is definitely possible! There are a couple different avenues to approach wildlife photography with the a shorter focal length lens-making the animal a part of the scene, like the duck in the autumn pond, or being patient and allowing your subject to get close enough for you to get a sharp image.
Additionally, most mirrorless cameras have the ability to crop the sensor down. On my Sony A7iii, this will give me an extra 1.4x magnification on any lens that I use. This definitely helps get in a little tighter on your subjects. This will make your image smaller, but if you have access to the Adobe suite, there are a few tools to increase the size of your image to make it print-worthy!
For newer photographers, remember that your camera settings for wildlife will vary greatly from your settings for landscapes.
In wildlife photography, you’ll want to focus on a high shutter speed. I like to sit somewhere between 1/1000 to 1/1600 for most wildlife. This may require you to bump up your ISO value, don’t be afraid-yes, you may introduce noise to your image, but Lightroom has some impressive noise reduction applications so you don’t have to worry!
Explore Where You Live
I’ve lived in Northeast Ohio for a large part of my life and I really thought I knew where I lived. It wasn’t until that I really picked up photography in full-force that I realized that there was so much other my home that I had no idea about!
With a little searching on the internet, AllTrails and just driving around, I found so many waterfalls, water mills and overlooks that made for incredible photographs. There are so many different applications that you can take advantage of to help find great photo locations. Even Google Maps and Google Earth have started adapting their satellites to capture street-views of trails that you can use to explore.
Searching for parks and other historical sites can offer a huge value, too.
Bottom line-don’t be afraid to explore your home state, or area. This world is so much bigger than we give it credit for and your local area isn’t any different!
Travel
I know that not everyone can travel at the drop of a hat-I can’t either, but traveling doesn’t have to mean jumping on an airplane and flying across two timezones. A lot of times I will jump in the car on weekend day and drive 2, 3, or 4 hours to hike about the local area, or visit a spot I have wanted to photograph.
Last month, I drove 4 hours to West Virginia to get the image you’ve seen above at a Babcock State Park. My wife and I walked around with the dogs for a few hours, then we jumped in the car headed for home. Last year, we did the same, but this time to the Finger Lakes region of New York. We stayed in a questionable hotel and spent most of the weekend taking in the fall foliage and capturing waterfalls!
Traveling doesn’t have to be expensive. In fact, for our day to West Virginia, we spent about $65 dollars on gas and probably $25 at McDonald’s (largely because I like to ‘sample’ their menu). That’s about the same cost of staying inside and having lunch and dinner delivered.
One tip I have to give is to keep a log of the places you’d like to visit. I have a tab on my Notes app where I list out all the places I see on social media that I want to photograph. Mine is broken down state by state, but yours doesn’t have to be that organized.
I think traveling for photography is extremely helpful. It gives you an opportunity to see something different from your day-to-day. You’ll also have a crash course in carefully crafting your image, because if you leave - you leave. You’ll want to make sure you get that image exactly as you like it! Plus, traveling is just good for the soul in general.
If there is one thing that the Midwest has taught me about photography-it’s that it isn’t about where you are, but its about how you see it.
You don’t need dramatic mountains, or endless coastline to create beautiful images. You do need patience. You need intention. And you need to learn to work with the conditions you’ve been dealt.
The light won’t always be perfect; the scene won’t always stand out right away, but if you are willing to slow down, return or look a little deeper, you’ll start to find images you didn’t know were there.
Who knows, maybe in the process, you’ll find yourself a little more appreciative of the place you’re standing in!
If you’d like to see more of work, feel free to head over to my gallery! Woods | Water | Desert | Wildlife | Structures

10 Pieces of Hiking Gear Nobody Talks About (But Every Hiker Should Carry)
Everyone knows the basics—but it’s the overlooked hiking gear that makes the biggest difference. Here are 10 underrated items that can keep you comfortable, prepared, and safe on the trail.

As winter loosens its grip and the first hints of spring begin to show, hikers everywhere start feeling the familiar pull back to the trail. Boots come out of the closet, backpacks get dusted off, and the promise of fresh air and longer days makes it hard to stay indoors.
Most hikers know the obvious gear to pack.
The boots are laced up. The backpack is ready. Water bottles are filled, and maybe a camera finds its way into the pack to capture the views waiting somewhere down the trail.
But spend enough time outdoors and you start to realize something important: the gear that matters most is often the gear nobody talks about.
It’s the pair of socks that saves your feet after ten miles. The small strip of blister tape that turns a miserable hike into a manageable one. The tiny first aid kit buried in the bottom of your pack that you hope you never need—but are incredibly glad to have when the moment arrives.
These aren’t the flashy items you see in glossy advertisements or gear reviews. They’re the quiet essentials—the small pieces of equipment that experienced hikers learn to carry through trial, error, and miles on the trail.
So as hiking season begins again, here are 10 pieces of hiking gear nobody talks about… but every hiker should carry.
NOTE: I am not affiliated with any brands that may be listed in this article. Any recommendation made is purely based off my experience. Links will be listed at the base of this article, but I do not receive any form of compensation from their purchase.
1. The First Aid Kit
I have this listed as number one because it’s one of the most important pieces of hiking gear missing from far too many packs. A quality hiking first aid kit should be with you—not just on long hikes, but even on short walks around the lake.
This past weekend was a bit of a wake-up call for me—and a big part of the reason this article is being written.
My wife and I took a quick day trip to Hocking Hills State Park. We were running behind, and I was focused on getting to a waterfall at just the right time for a photo. In the rush, I didn’t thoroughly check my pack. After all, it was just a 2-mile loop… what could go wrong?
Sure enough, while jumping from a large boulder in the riverbed back to the bank, I slammed my hand into a broken tree branch.
Thankfully, the injury wasn’t too serious. I kept my hand elevated until we made it back to the car—and luckily, I had a gym bag with bandages waiting for me. But it was a reminder: it could have been much worse.
And that’s really the point—things don’t have to go terribly wrong for them to go wrong enough.
Now you might be wondering: what kind of first aid kit should I bring hiking?
Personally, I recommend building your own kit. That said, I know that’s not everyone’s preference—and even a simple pre-made kit from your local pharmacy is far better than nothing.
If you do go the pre-made route, take a moment to check what’s actually included. Many kits are filled with cheap, unnecessary items just to bulk up the contents. My rule of thumb: make sure you know how to use at least 75% of what’s inside. The supplies won’t help you if you don’t know how to use them.
If you’re interested in building your own, here are a few essentials to start with:
Adhesive Bandages
Any brand will work, but I’ve personally had great luck with Band-Aid. The key is having a variety of sizes—because not all cuts are created equal.
Gauze and Medical Tape
A couple rolls of gauze and quality tape can handle a wide range of injuries. This is one of the most versatile items in your kit. Having a pair of sheers, or scissors is critical to have also. Just remember to take them out of your kit if you get on an airplane!
Antiseptic (Wipes or Ointment)
Great for cleaning wounds, especially on longer hikes. Individual packets are lightweight and easy to pack.
Burn Ointment
If you carry a camp stove, this is a must-have. Burns happen fast, and having proper treatment on hand makes a big difference.
Emergency Blanket
One of the most underrated items you can carry. Even on short hikes, this can be critical in an emergency.
Pro Tip: Emergency blankets work by reflecting your body heat. Leave a little space between your body and the blanket so it can trap and reflect that heat effectively.
Honorable Mentions:
Tourniquet, compression wraps, and splints. These aren’t essential for everyone, but if you have the space, they can be incredibly valuable—especially for common injuries like rolled ankles.
2. Blister Tape
This could easily be included in your first aid kit—but it deserves some attention of its own.
Blisters are one of the most common (and frustrating) issues hikers run into. And once they start, they don’t get better—they just get worse with every step.
That’s where blister tape (often called Leukotape or moleskin) comes in.
Blister tape works by reducing friction—the real cause of blisters in the first place. You can apply it as a preventative measure on hot spots, or over an existing blister to protect the area and keep you moving comfortably.
If you’re treating a blister, one effective method is to cut the tape slightly larger than the affected area and create a small opening so the blister isn’t directly compressed. This helps relieve pressure while still protecting the surrounding skin.
Personally, I’ve always used Moleskin. It’s what was available at the PX on Parris Island when I went through boot camp—and after the relief it gave me then, I’ve stuck with it ever since. At this point, it’s probably more tradition than anything else.
It may cost a little more than standard bandages, but when you’re miles into a hike and every step starts to hurt, it’s worth its weight in gold.
3. Head Lamp
This is another piece of hiking gear I learned the importance of firsthand.
My wife and I took a trip to Sedona, Arizona over the winter. We had just finished a long hike on the Boynton Canyon Trail and decided we still had enough energy to make the trek out to Devil’s Bridge.
Everything went fine—at first.
What I didn’t account for was how quickly daylight fades in a canyon. It gets dark faster than you expect, especially when the sun drops behind the rock walls.
Before we knew it, we were facing nearly a 2-mile hike back in complete darkness.
We had left our lodging around 8:00 AM that morning, and it never crossed my mind that we’d still be out after sunset. I was incredibly thankful for my background in nighttime land navigation—because relying on a cell phone flashlight wasn’t cutting it. In some ways, it actually made things worse by limiting our field of vision.
Needless to say, a headlamp for hiking has been a permanent fixture in my pack ever since.
And the truth is—you don’t need anything fancy.
Headlamps range anywhere from $10 to a couple hundred dollars. If you’ve got the budget, go for a higher-end option. But for most hikers, a reliable, mid-range headlamp will do the job just fine.
At a minimum, look for:
Good battery life
Water resistance
A solid lumen output (brightness)
If your headlamp uses disposable batteries, make sure you carry extras—preferably stored in a waterproof container. When you need a headlamp, you really need it.
4. Trash Bag or Pack Liner
This one is simple—and that’s exactly why it gets overlooked.
Most of us already have a few of these sitting under the kitchen sink, but a basic trash bag can be one of the most useful pieces of gear in your pack. When used as a pack liner for hiking, it adds an extra layer of protection that you’ll be grateful for when conditions turn.
Many hiking backpacks are water-resistant, and some even come with rain covers. But even with those features, no one has ever been disappointed pulling dry gear out of their bag.
A plastic bag is a lightweight, reliable way to keep your essentials dry—whether you get caught in a downpour or accidentally set your pack down on wet ground.
It’s also incredibly useful for separating wet and dry gear. Decide to take a dip in a creek or lake? No problem. Toss your wet clothes in the bag, throw it back in your pack, and keep everything else dry.
And then there’s the most important use—packing out your trash.
One of the best parts of hiking is stepping into a place that feels untouched. Forests, deserts, rivers—they all feel a little more special when there’s no sign that anyone else has been there before you.
That only works if we all do our part.
I’m sure everyone reading this has heard the phrase “Leave No Trace.” But somehow, I still find wrappers tucked into brush and litter along the trail—even in our National Parks.
A simple trash bag weighs next to nothing, but it gives you the ability to leave a place exactly as you found it—or even better.
5. Emergency Whistle
You may have noticed a theme in this list—many of these items are centered around personal safety. And that’s exactly the point.
There are plenty of guides covering the best clothing, backpacks, and boots. But when it comes to hiking safety gear, those conversations often get overlooked.
Enter: the emergency whistle.
An emergency whistle for hiking is one of the simplest and most valuable pieces of gear you can carry. It’s lightweight, inexpensive, and incredibly effective when you need to signal for help.
And when I say effective—I mean far more effective than your voice.
A whistle can carry much farther than shouting, and it doesn’t wear you out nearly as quickly. In a real emergency, that matters.
The best part? You don’t need anything fancy. A basic whistle can be picked up for just a few dollars at an outdoor store, military surplus shop, or online.
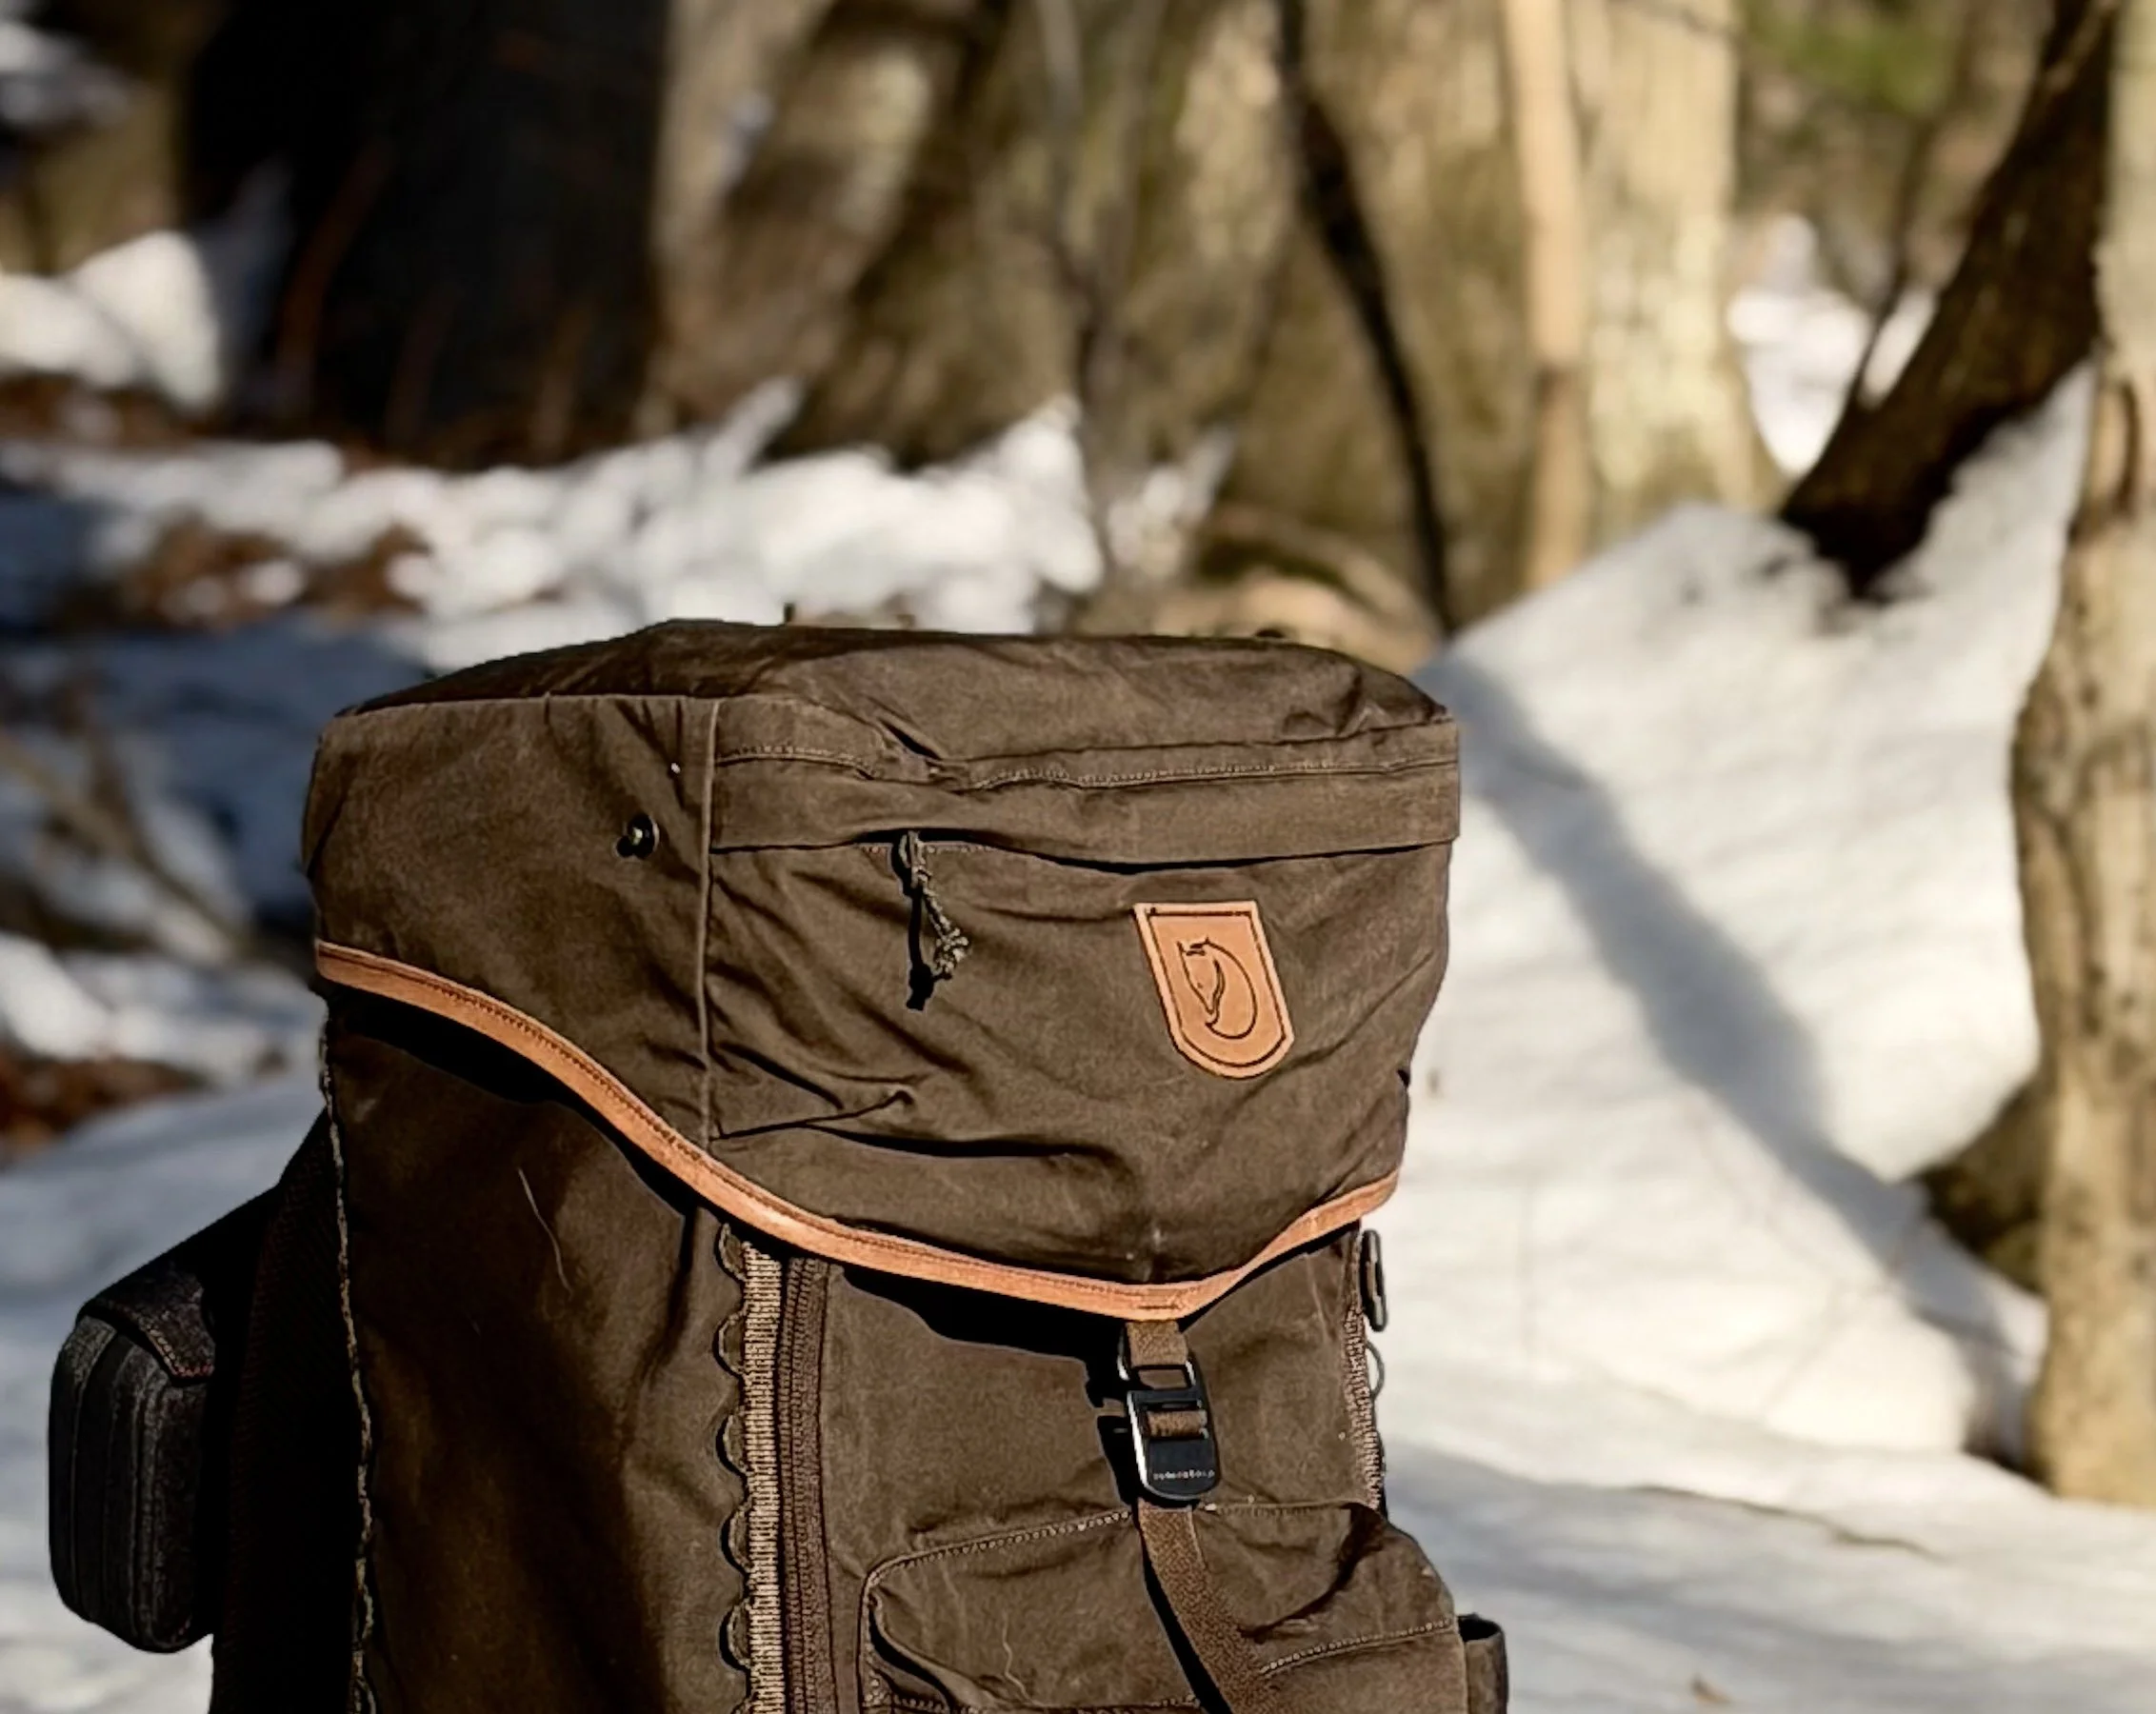
Interestingly, many modern backpacks already have one built in. I’ve used several packs from brands like REI and Fjällräven, and they often include a whistle integrated into the sternum strap.
Honestly—it’s a brilliant design.
If you’re wearing your pack, you automatically have your whistle with you, exactly when you might need it most. If you’re shopping for a new backpack, this is a small feature that’s absolutely worth considering.
6. Portable Battery Pack
Remember that story I told about getting caught in the dark in Arizona?
There’s one detail I left out that made the situation even worse—our phone batteries were nearly dead.
In a moment where we were relying on our phones for light and navigation, we were quickly running out of both.
That’s why a portable battery pack for hiking is such an easy but important addition to your gear.
These days, most of us already have one sitting around at home. Taking a few minutes to charge it before heading out and tossing it in your pack can make a big difference when you need it most.
On shorter hikes, you may never touch it—and that’s fine. But when something unexpected happens, or your day runs longer than planned, having that extra power becomes incredibly valuable.
And if you’re anything like me—carrying camera gear into the field—it’s even more useful. Between phones, cameras, and other electronics, a little extra battery life can go a long way.
7. Extra Socks
I don’t know how many miles I have hiked in my lifetime, but it has to be in the thousands. One thing I have always taken on a hike with me is an extra pair of socks.
For hiking, merino wool socks reign supreme - there are some good performance socks out there that seem to hold up pretty well, Still, I always recommend a solid couple pairs of merino wool. They are moisture wicking, durable and sometimes padded - if that is what you like!
Having an extra pair with you on your journey is wonderful. Picture yourself on a 10-mile hike: you have made it 5 miles on a warm day, your socks are wet, your foot is sliding around in your boot with each step, you feel the callus trying to pull from your foot - then you stop slap on a dry pair of socks and it is like you just started the hike! I haven’t won the lottery before, but I am sure it feels the same.
When you wear the same socks for extended periods of time, you are opening yourself up to friction blisters on your feet, an increased risk of fungal infections (like athletes foot) and when perspiration mixes with dirt in your boots; your socks will actually lose their moisture-wicking capabilities! That’s why I always pack an extra pair with me, if I don’t use them - I don’t use them!
8. DEET Insect Repellent
This isn’t always something you need to carry in your pack—but it’s absolutely something you should think about before you leave.
A good DEET insect repellent for hiking can make a huge difference, especially during warmer months or in wooded areas. For shorter hikes, applying it before you hit the trail is usually enough. But if you’re heading out for a longer day—or spending the night—it’s worth tossing a small bottle in your pack.
I typically recommend a repellent with 25–30% DEET. It’s highly effective against mosquitoes, and more importantly, ticks.
Mosquitoes are annoying—but ticks are something I take seriously.
We head outdoors to get away from the noise of everyday life, not to come home with something like Lyme disease. Taking a few simple precautions goes a long way.
I’ve personally had great results using OFF! Deep Woods, but there are plenty of solid options on the market.
If you prefer alternatives, there are non-DEET options available as well. For example, the CDC notes that oil of lemon eucalyptus (around 30% concentration) can be effective against mosquitoes for several hours. That said, these alternatives aren’t always as reliable against ticks, so it’s worth doing your own research and choosing what you’re comfortable with.
No matter what method you choose, it’s important to remember—nothing is 100% effective.
That’s why one of the best habits you can build is doing a quick check when you get back to your car.
Take a minute to look over your boots, legs, and clothing before heading home. Work your way up and make sure you didn’t pick up any hitchhikers along the way.
Because the only thing worse than finding a tick on the trail…
is finding one in your house later.
9. Ole Reliable - Multi-Tool
I’m sure you’ve heard it before—but I’m going to say it anyway: bring a multi-tool.
A good multi-tool for hiking is one of the most versatile pieces of gear you can carry. You could even argue it’s something you shouldn’t leave the house without… although I’ll admit, I don’t always have one on me at the grocery store.
With so many options out there, it’s easy to get overwhelmed. And yes, some multi-tools can get expensive. Here’s the truth, you don’t need to spend a fortune to get something reliable and capable.
Here are a couple options I’ve personally used and trust:
Gerber – Suspension
The Gerber Suspension is a fantastic value. At around $60, it gives you just about everything you could need on the trail—or even around the house.
It includes 12 tools, most notably:
Knife
Saw blade
Needle-nose pliers
Scissors
Bottle opener
I carried this tool for nearly 10 years. It went with me through my time in the service—from the Carolinas to the desert—and handled everything I threw at it.
There’s probably still sand hiding somewhere inside it. I’ve taken it apart more times than I can count and still haven’t found it.
I’ve only had to sharpen it a couple times in its entire life. For the price, durability, and versatility, it’s hard to beat—especially for casual users.
Leatherman – Signal
The Leatherman Signal is another excellent option, though it comes at a higher price point—around $150.
With 19 tools, it offers a bit more functionality in a slightly smaller, lighter package. If weight and compactness are priorities for you, that alone might justify the extra cost.
It also comes in a variety of colors, which is a nice bonus if you like your gear to feel a bit more personal.
I ended up switching to a Leatherman after my wife won one at a work raffle—and if there’s one thing I’ve learned, it’s that when your wife gives you a gift… you use it.
At the end of the day, whether you spend $60 or $150, the goal is the same: have a reliable tool on hand when something unexpected comes up.
Because out on the trail, it’s not about having the perfect tool—it’s about having something when you need it.
10. A Compass and a Map
This final item is a three-part system: a map, a compass, and the knowledge to use them.
And I’ll say it again—because it’s that important:
Having a compass and map for hiking, and knowing how to use them, is essential.
One of the best parts of the outdoors is the lack of cell service. It’s also one of the most dangerous.
Without service, you lose access to GPS apps like Google Maps, and it doesn’t take much to get turned around—especially in wooded areas or unfamiliar terrain. Having a reliable backup plan isn’t optional… it’s critical.
The Map
When I say “map,” it doesn’t have to be anything fancy.
Many trailheads offer free maps at kiosks. They may not be highly detailed, but they usually include:
Landmarks
Trail routes
Basic directional guidance
And at the end of the day, something is always better than nothing.
The Compass
There are several types of compasses out there—baseplate, mirror, lensatic, and electronic. Each has its own advantages, but also requires some practice to use effectively.
For most hikers, I recommend keeping it simple with a baseplate compass, like the Suunto A-10 NH.
It’s:
Affordable (usually under $25)
Reliable
Easy to learn
Includes scale markings for measuring distance on a map
It’s a great entry point into real navigation.
Pro Tip: If you purchase from REI, don’t hesitate to ask a team member for help. Many of them are incredibly knowledgeable and can give you a quick crash course on how to use your compass.
A more “modern” approach to having #10 in your pack would be using offline-GPS apps like, All Trails. All Trails is super handy to have not just for planning your trips, but for use when you are “out there.” you can use just about any of the apps that on the market, but I personally prefer All Trails - but this is just a personal preference. One important thing to note here, a lot of these apps have a free version, but in order to access the offline features - you’ll need to upgrade to their paid versions. All Trails+ will run about $39.99 per year, while All Trails Peak weighs in at $79.99 (at the time of writing this article). I’ll break down the differences between the two paid versions below:
AllTrails+:
Ad-Free and Advanced Views; 3D Maps and printing capabilities (great for printing your map before hitting the trail
“Lifeline,” a safety GPS tracking to alert you of wrong turns
This is GREAT if you have an Apple Watch. You can link AllTrails to your watch and it will give you a compass on your wrist that highlights if you are headed in the right direction. If you are going the right way, you’ll get a green bar, a little off - yellow and wrong way will be red!
Offline Maps allows you to download trail maps to your cell phone for viewing when you don’t have cell service. These maps will be specific to the trail route selected. You cannot make changes, or customizations to these maps.
IMPORTANT: Remember to download your maps BEFORE you leave your house! A lot of trail heads have spotty service and can prohibit the map downloads!
AllTrails Peak:
Allows you to create and download custom trail routes. If you plan on doing multiple trails on an outing (like the Towpath to another branch) this may be a reasonable option to you. You will be able to download your custom route for offline use, too.
The Community Heatmap feature will show you metrics on how busy a particular trail may be. This is kind of neat for discovering “hidden” trails.”
“Advanced Conditions” will give you real-time data on weather, air-quality and trail conditions.
It’s up to you which subscription you go with, should you decided on the AllTrails route. Personally, I don’t find enough value in the Peak upgrade to justify the additional $30. One could say that you could use that $30 on a compass… If I am missing something, write me a note in the comments!
Call me old fashioned, but I still carry my map and my compass. Technology is great, but it isn’t perfect. Not to mention, in an emergency situation, something could happen to you phone. Drop it too hard on rocks, soak it in water, or your battery could just die because you didn’t have service and your phone was roaming for hours. If you want an A+ grade on your pack loadout, you better have a portable battery pack in there if you choose to just go the electronic route!
At the end of the day, none of this gear is about being over-prepared or taking the fun out of the great outdoors. It’s about giving you the freedom to fully enjoy it. When I think about getting outside and the way it makes me feel, my hope is that more people get to experience it in a way I do. I hope to make the outdoors more accessible to others, but in a way that is safe or helps prevent a bad experience.
The trails can be great way to relax, but they can also be pretty humbling at times and it is almost always a small, overlooked item that could have made a world of difference!
These items aren’t the types of gear that get the spotlight, or will really increase your visual credibility among fellow hikers. Regardless, these are the items that will keep you safe and comfortable and make sure you get to enjoy the outdoors over and over again.
As you pack up for your next hike-whether it is your first or your thousandth- take a second look at the little things. Because, sometimes the gear nobody talks about - is the gear that matters most!
The Best 2-Day New York Fall Foliage Getaway: The Genesee Region

Photo taken at Watkins Glen State Park near Jacob's Ladder (copyright Stephen Garber, 2025)
It’s official — the promise of autumn’s leaves is here. The crisp air, the golden light, and those rolling hillsides bathed in orange and fiery red make this the most magical time of year in New York. Just a few hours from New York City, the Genesee Region transforms into one of the state’s most breathtaking fall foliage destinations. With its beautiful hikes, scenic drives, and small-town charm, it’s the perfect place to slow down, breathe in the season, and feel like the main character in your very own Hallmark movie.
Whether you are planning a spontaneous weekend escape (like I did) or a carefully mapped-out road trip, this 2-day New York fall foliage itinerary through the Genesee region highlights the best places to soak up the season - from dramatic waterfalls and colorful gorges to picturesque Main Street and country roads painted in autumn's brightest hues.
Ready to go leaf-peepin'? Here is how to make the most of two perfect days exploring the Genesee Valley - one of New York's most underrated fall foliage getaways!
Day 1: Letchworth State Park & Corning, New York
Letchworth State Park
We started our trip from Painted Post, NY (where we chose to stay the night) which is a little over an hour's drive to Letchworth State Park, but don't let that scare you! This will put you in a perfect position for Day 2. Rise and shine should be somewhere around 08:00 AM EST and try to hit the road by 08:30 AM.

While you are on your way, I urge you to stop for breakfast at Ella's Acre's in Corning, NY. When I say we were shocked by how good the food was, we were shocked - and I consider myself a bit of a 'breakfast snob.' Ella's prides themselves in operating farm to table. Just about everything on the menu was sourced locally and the the pride really shows in the flavor. They have options to fit everyone and their dietary restrictions; offering gluten-free and vegan options. I promise you, this is worth the stop. After breakfast you will head out on I-86 and I-390 which offer you stunning views of the hills and tress changing color. You won't even notice that you have been driving for an hour by the time you arrive at Letchworth State Park
Arriving and parking at the park is VERY easy! Keep in mind that you will have to pay a $10 fee for a day permit at the park. You'll find ample parking throughout the park, but I recommend driving all the way down to the Upper Falls parking area. Once you are there, throw that car in park, grab your gear and get walking! The walk from the parking lot to the Upper Falls is pretty easy, it is all paved and very accessible as far as trails go.
Be sure to take your time at Letchworth State Park, it is voted the #1 State Park in the country for a reason. The main attraction here is the waterfall of the Genesee River. The river itself bisects the park and has created a deep, 17-mile gorge. It is truly breathtaking. When you enter the park, you will be given a map that shows all the trails and viewpoints throughout the park, Keep in mind that while the trail key shows distances, they are only one-way distances. So, if you want to hike the entire Gorge Trail, remember that it is 7 miles to the end and 7 miles back. The park does offer shuttle services on select weekends. However, if you plan to use this service, I would do your homework on what weekends it is available. The most-enjoyed parts of the park will be the Upper Falls, Middle Falls, Lower Falls and Inspiration Point (which you will walk into if you walk the trail from Upper to Lower). You can expect some pretty heavy foot traffic in these areas, so be patient and plan ahead if you want to get some great pictures of the waterfall.
The park has an incredible amount of amenities for a State Park (at least as far as I am used to). Inside the park you will find restrooms at just about every trail head, concessions that serve a variety of food, drinks and those little sweet treats we all want on a road trip. It is safe to say that once you are in the park, the only reason you will have to leave is that it got dark outside.
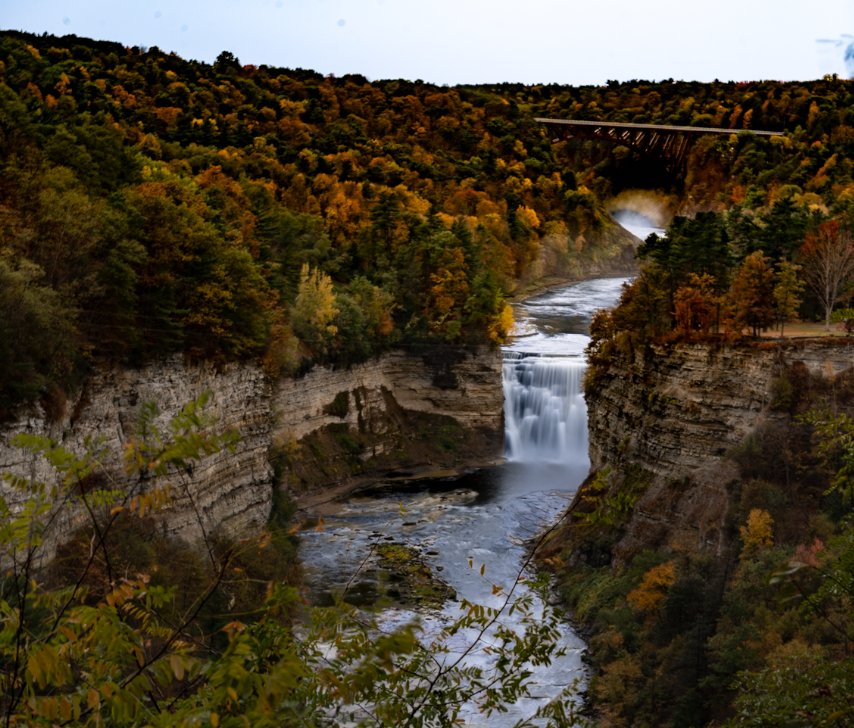
Photo taken at Inspiration Point, Letchworth State Park (copyright Stephen Garber, 2025)
Corning, New York
A big reason that we decided to stay in Painted Post, New York for the night was to comfortably spend the evening in Corning. This small town looks like it was taken right out of your favorite seasonal movie. Even though it is a small town, that doesn't mean that it doesn't have a ton to offer. Here you will find shops, bars, restaurants, the Corning Museum of Glass and even the Smithsonian-affiliated Rockwell Museum!

On the evening of Day 1, I recommend having dinner at Atlas Pizza on East Market Street. This pizza was to die for. If you enjoy a NY-style brick oven pizza loaded with cheese and toppings, this is your place. Their menu offerings are very dynamic from a build-your-own to house specialties. Maybe you also want to have a cold Miller Lite with your pizza, reward yourself for a good day of trekking; lucky for you they have alcohol available, too! The shop is situated conveniently in the center of the downtown plaza, which makes it a great option to do a little walking around to help burn off those carbs.
Day 2: Watkins Glen State Park & The Village of Watkins Glen
Watkins Glen State Park
If you were impressed with Day 1, strap in because I think Day 2 has it beat! You'll want to leave your accommodations at close to the same time as you did yesterday. If you stayed in the Corning area, you'll only be about 25 minutes from the park. However, this park can be very busy at this time of year, so the earlier start you can get the better chance you have to beat the crowds! For this reason, we didn't really stop for breakfast. We settled for running through a nearby Starbucks for breakfast sandwiches and coffee.
Arriving at the park is important. Again, you will have to pay the $10 entrance fee and get your car parked. It is very important that you enter the park through the South entrance (3528 Route 419, Watkins Glen, NY 14891 - put this in your GPS) to get the best experience out of Watkins Glen. The entrance to the Gorge Trail from this side of the park takes you up the scenic route, the picturesque facing way.
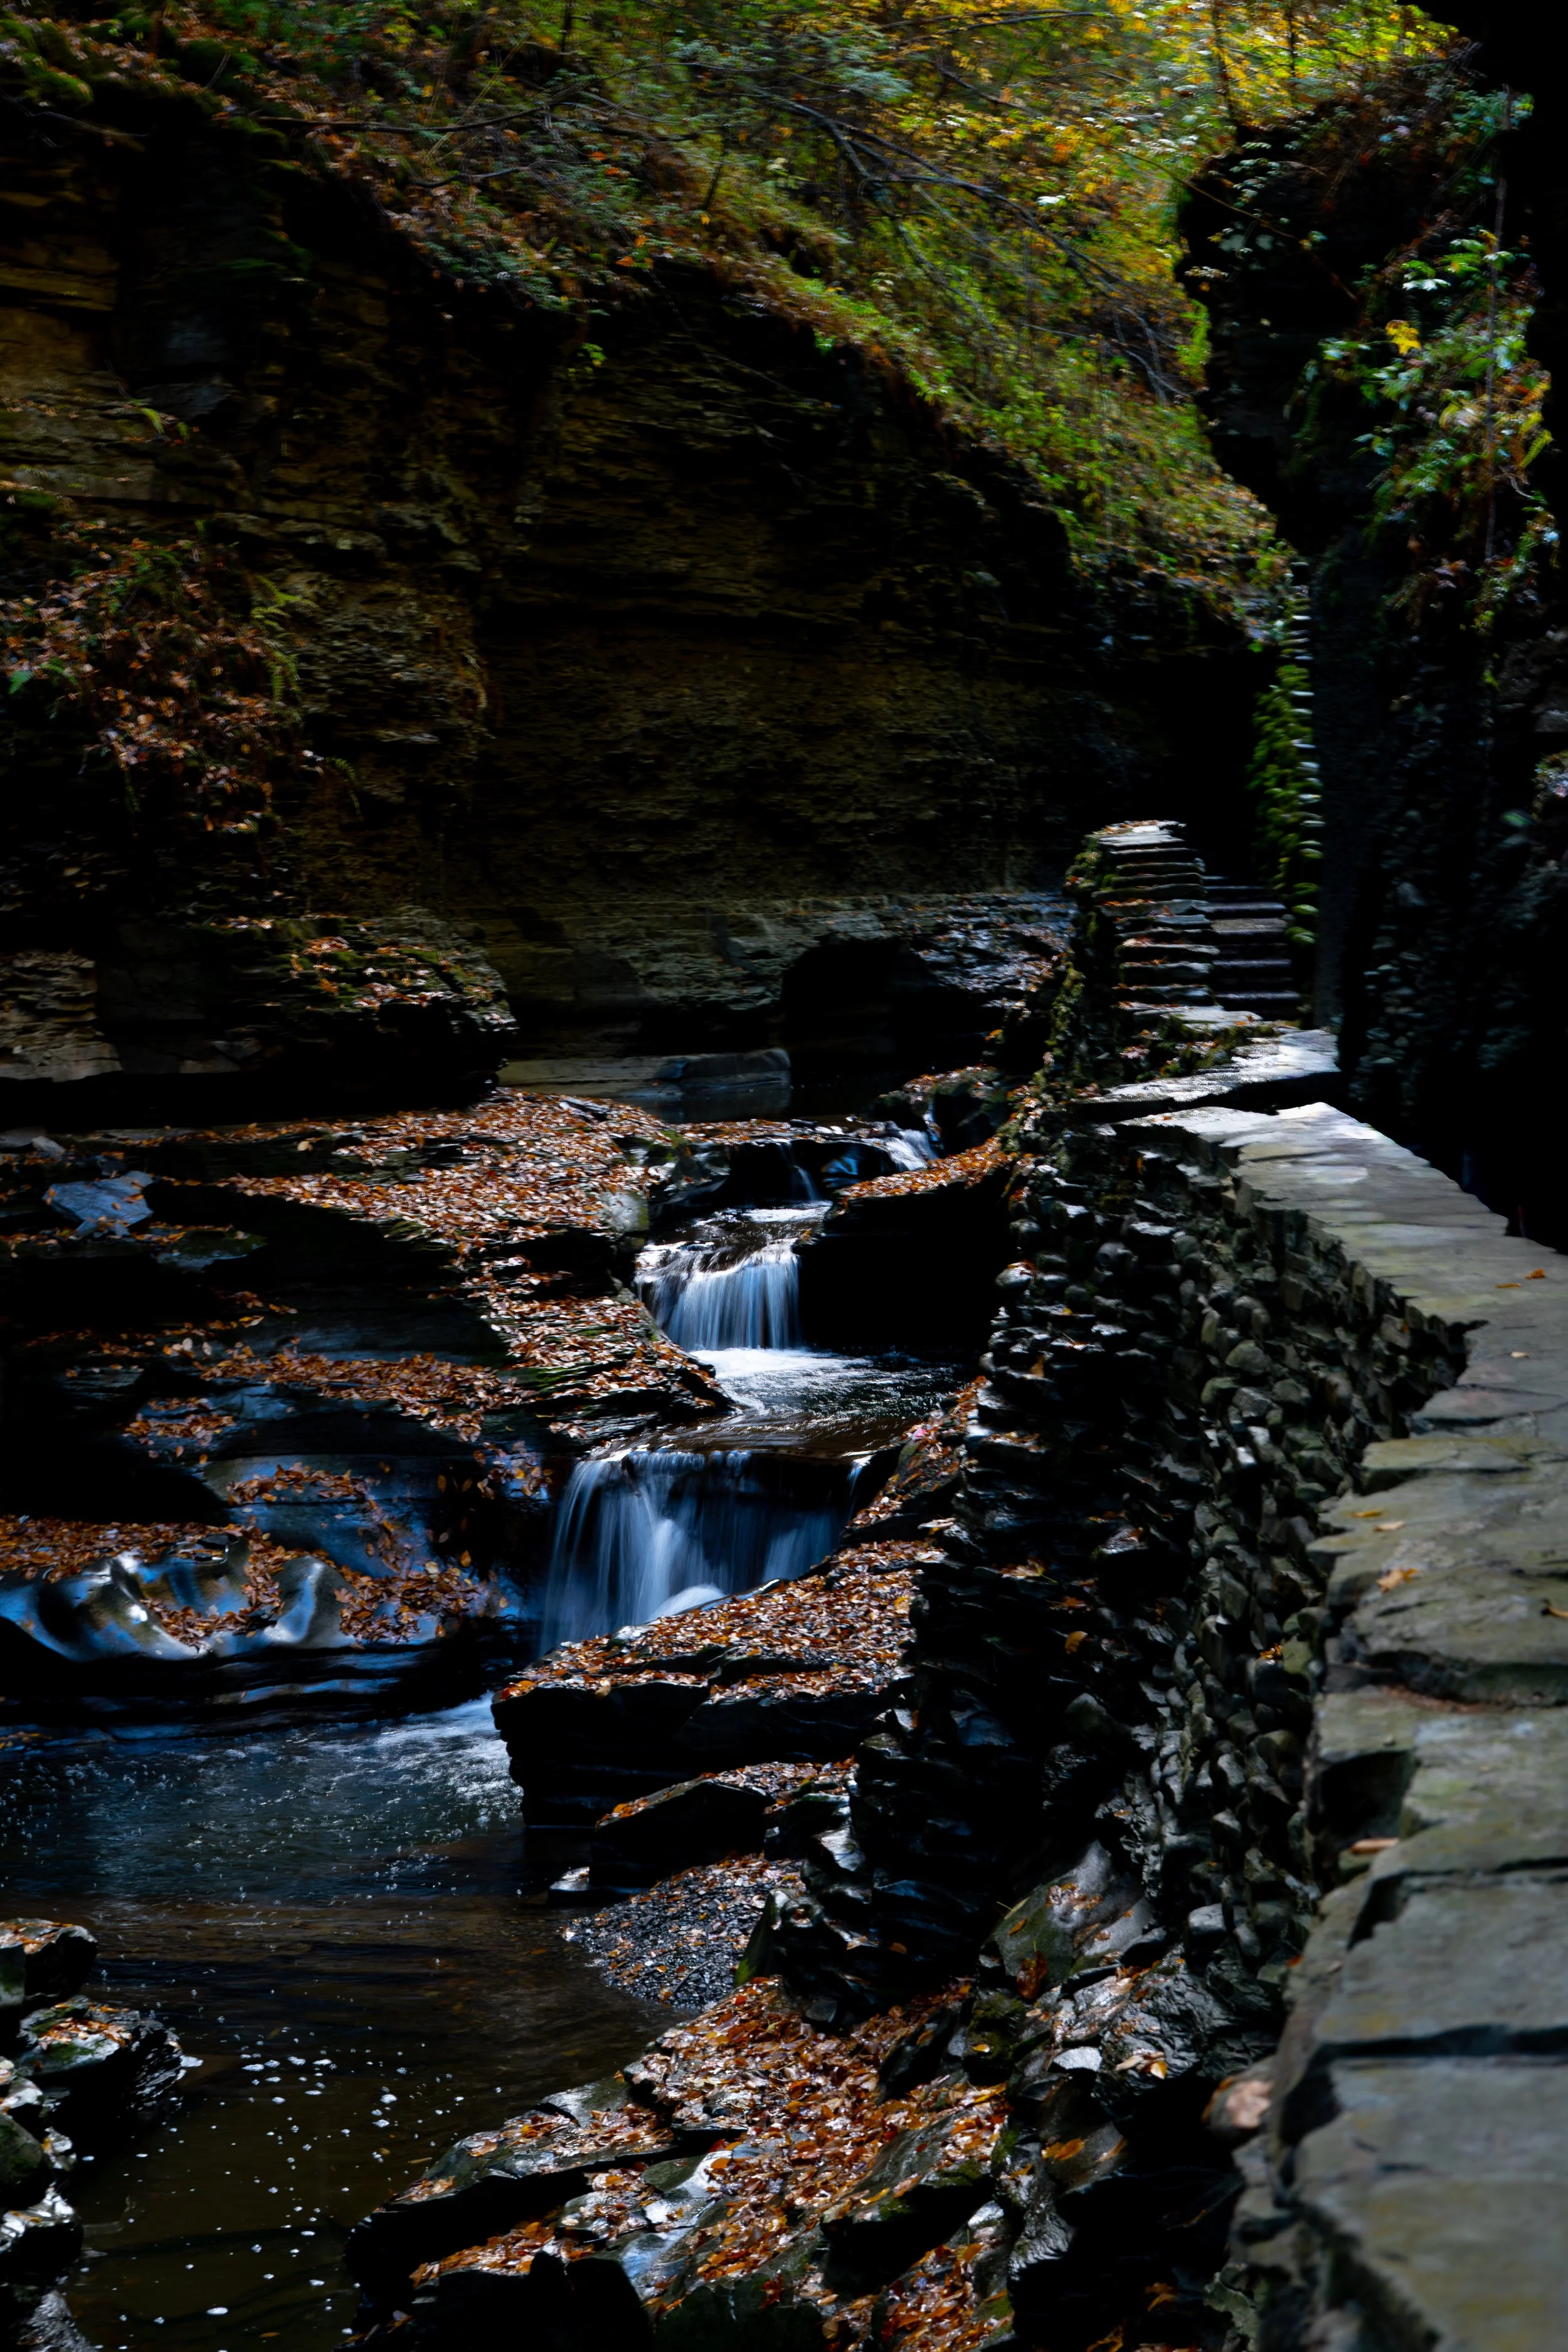
Photo taken at Watkins Glen State Park (copyright Stephen Garber, 2025)
The Gorge trail itself is only 1.5 miles (one way), but it is a little slippery and can be very crowded so it will take you a little bit of time. Stopping for photos along the way, it took me a little more than an hour and a half to make the walk. Be sure to take your time, Watkins Glen has 19 waterfalls for you to see, so be sure not to miss any of them! At the end of the trail, you will come across a stair climb known as "Jacob's Ladder." This is a pretty steep incline, so if you have trouble with stairs, this might be a good spot for you to turn around if you wish. After finishing the ladder, you can take the North Rim Trail (1.1 miles) to the Visitor Center and gift shop. There is a long run of stairs at the end of this trail to reach the center, so consider this if you wish to take this route. If you are a bit worn out after the hike, there is a shuttle service that runs until 05:30 PM that costs $6 per person and will take you back to your car.
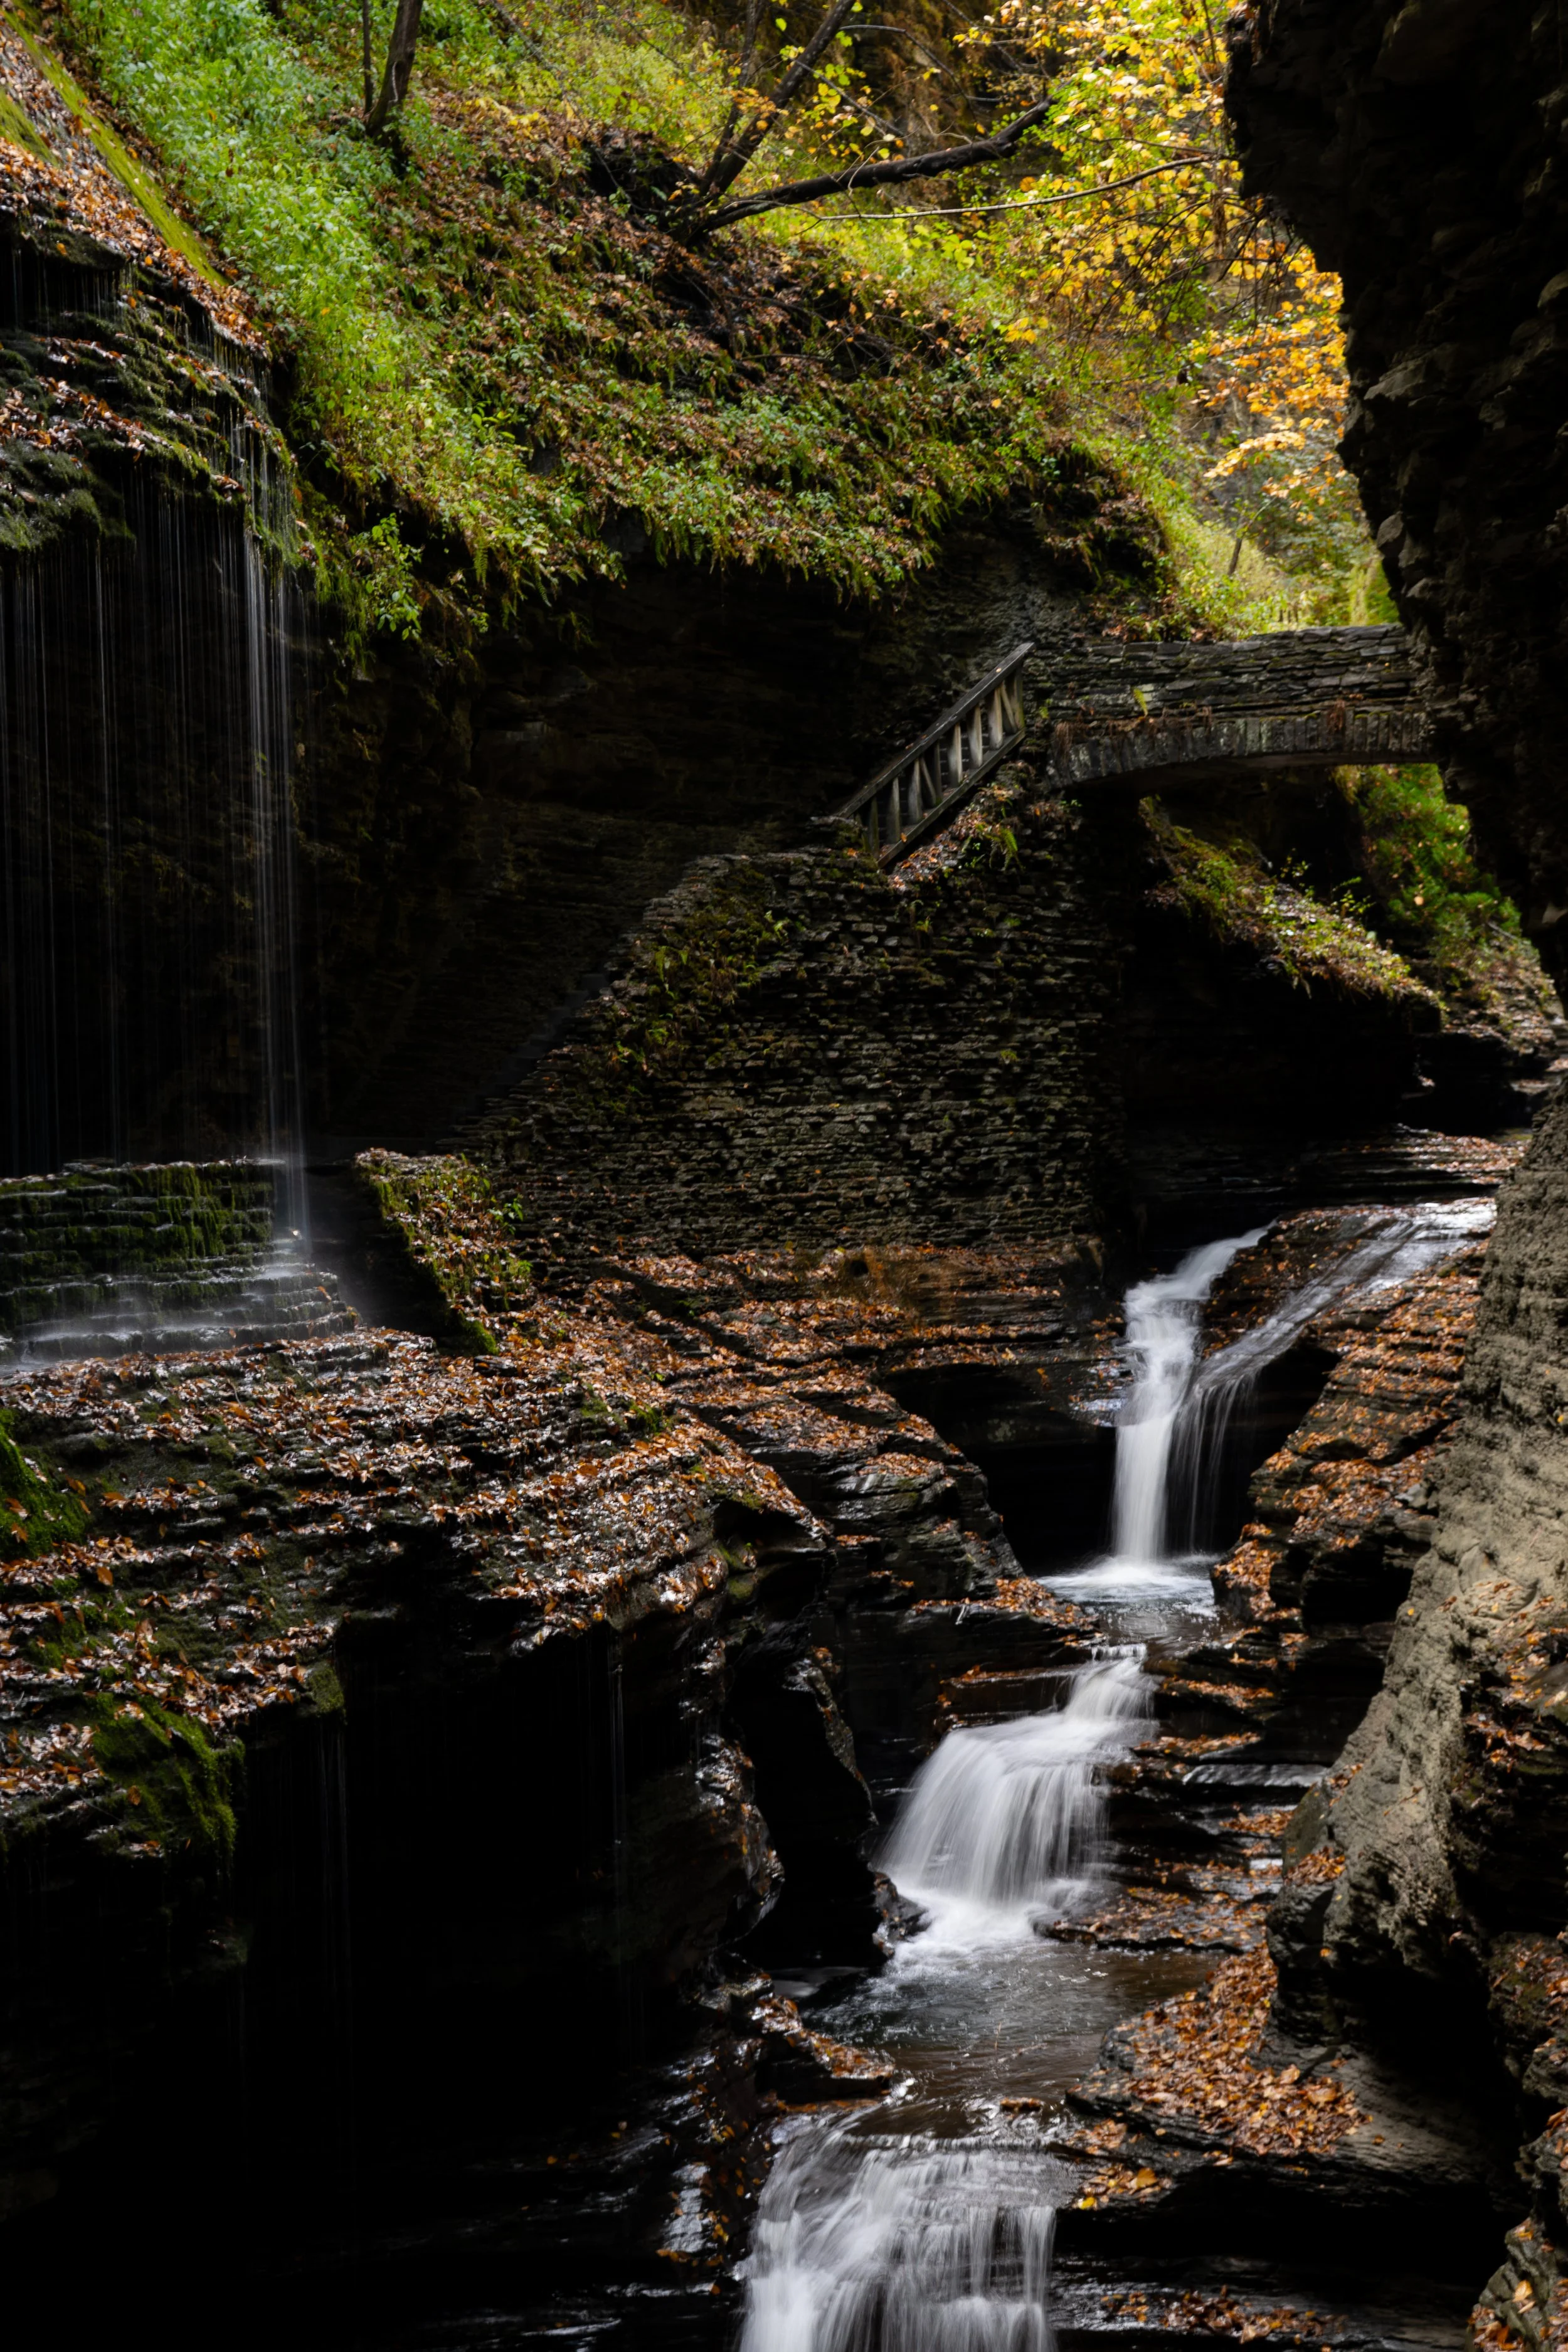
One thing worth noting about your visit to Watkins Glen - dress accordingly! This is more of a tip than it is a rule, by any means, but Watkins Glen can be a very wet and slippery environment. I would recommend wearing waterproof shoes and bringing your rain jacket; at the very least, I would wear some shoes you don't care about (like your grass-cutting shoes) and an extra pair of socks. You won't be restricted by your choice of footwear, but there are some large puddles and a fair bit of mud on the Gorge Trail; I saw a lot of folks ruin their bright-white sneakers on this trip.
Photo taken at Watkins Glen State Park (copyright Stephen Garber, 2025)
Letchworth State Park is beautiful and rather large, but Watkins Glen is something out of another world. It feels like you were cast in a Lord of the Rings movie. I try to save Watkins Glen for last because I will think about it the entire 5 hour drive back to Northeast Ohio -- so I can imagine it may change my perspective on other places. I've included a couple shots that I really enjoy, but I don't think a photograph can do this gorge justice.
The fun of Watkins Glen, New York doesn't end at the park. By taking the trail to the visitor center, it puts you in a prime position to grab lunch in town and hang around North Franklin Street. My go-to recommendation after a morning spent walking in the gorge has to be Nickel's Pit Barbeque! They have a large menu of all those classic BBQ staples; brisket, pulled pork, wings - you name it. They have their own host of proprietary sauces, conveniently located at every table for your sampling. If you are going for the weekend and end up here on Sunday, they have plenty of televisions to watch your favorite team!
After lunch, you can cap off your trip by strolling the Village streets, checking out local business or stroll through a couple of galleries. The Village of Watkins Glen is also situated at the southern end of Seneca Lake. There are plenty of spaces for you to sit down to enjoy the view and the sail boats coasting across the water. Once you've had your fill, it's time to pack up the car and head on home. Unfortunately, you will have to return the real world, BUT at least you can think about how beautiful this trip Monday through Friday!
There is a lot more that Upstate New York has to offer, if you wish to extend your trip. Buttermilk Falls State Park, Taughannock Falls State Park, vineyards and much more within an hour's drive from either of these locations. For a weekend getaway, I think this itinerary is great. You get a nice mix of in-town life and nature, while not trying to pack too much activities into 2 days that you rush through it, or get home exhausted.
Now that you've got a plan, there is nothing stopping you from getting out there! I hope you do, it is absolutely stunning right now. I'd love to see some pictures that you take while you are out on the trails, you can find and tag me on Instagram: @stephens_trails_and_tales.